I do not treat caladium propagation the same way I would treat a trailing houseplant or a soft-stemmed cutting. A caladium leaf may stay fresh for a while, but a leaf or petiole alone is not enough to make a new plant. For me, real caladium propagation starts with the tuber.
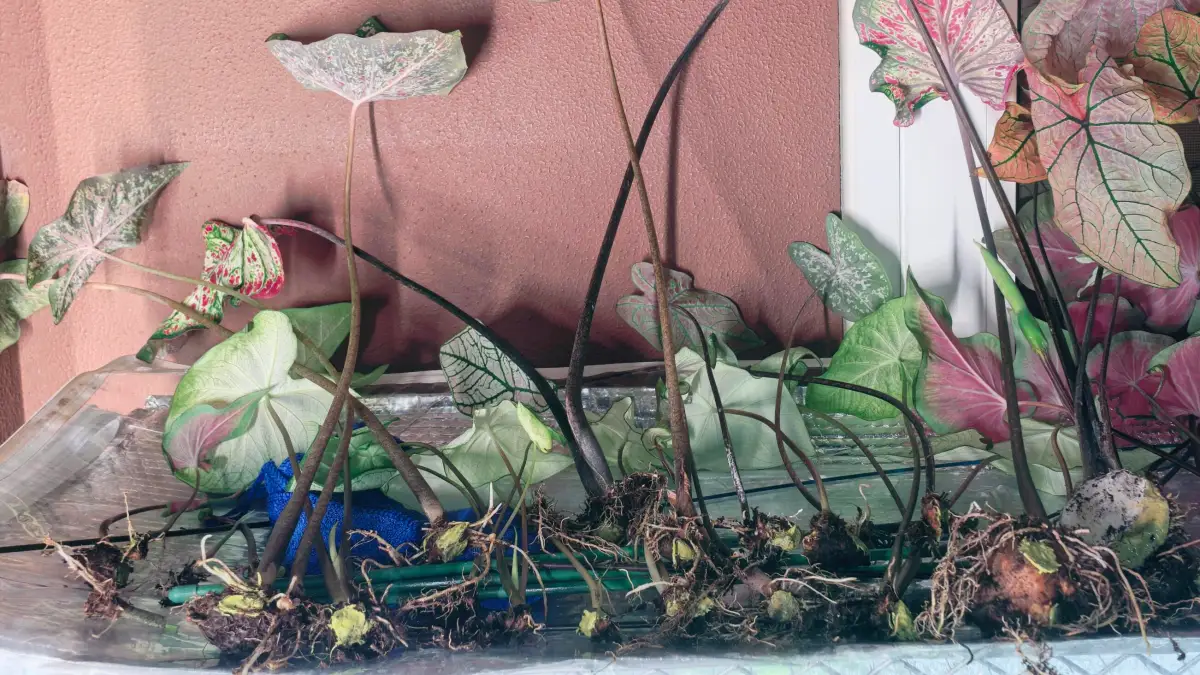
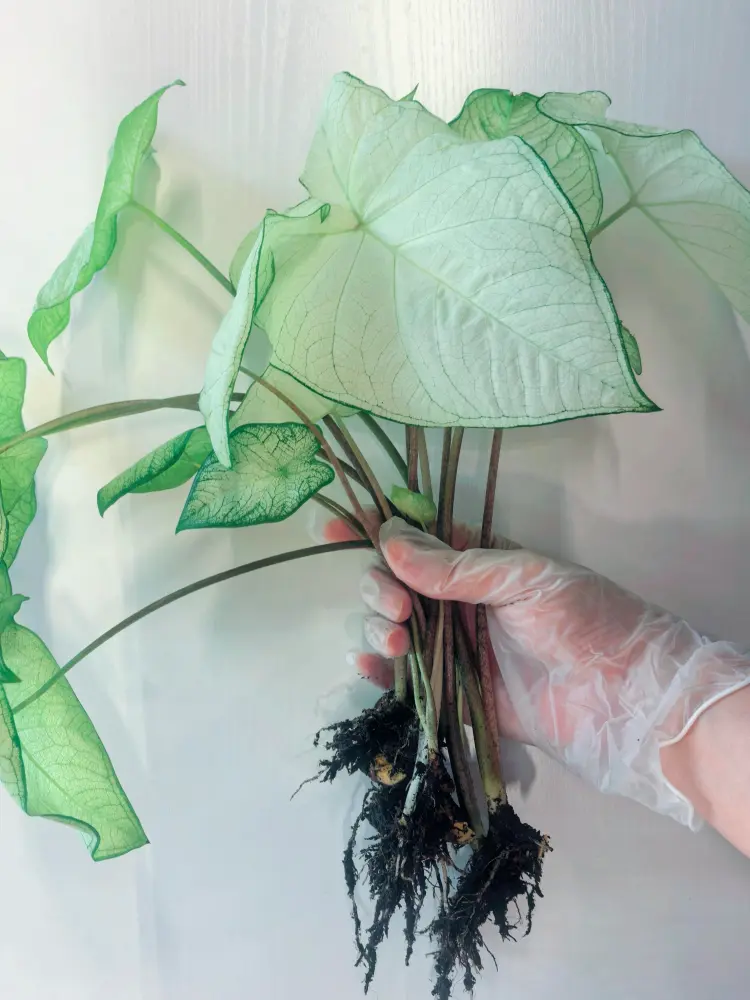
The two methods I trust are dividing a healthy tuber with visible growth points, or separating rooted shoots that have already formed around a larger tuber. Sometimes a pot looks simple above the soil, but once I unpot it, I find several small shoots growing from the same main tuber.
Those are the divisions I feel most comfortable working with. If a shoot has its own growth point and some roots, it has a real chance to become an independent plant. If I am only cutting a small piece with no clear eye or root system, I treat that as much riskier, not as an easy way to make more caladiums.
Quick Answer: The Safest Way to Propagate Caladiums
The safest way I propagate caladiums is by separating rooted shoots first. If a large tuber has already produced several shoots, and some of those shoots have their own roots, I would rather separate those sections than cut the tuber for no reason. A rooted shoot already has a growing point and a small root system, so it has a better chance of settling into its own pot.
Cutting the tuber is also possible, but I treat it more carefully. I only consider it when the tuber is firm, healthy, and has clear eyes, or visible growth points. Each piece needs at least one place where new growth can actually emerge. Without that, a piece of tuber may sit in the soil for weeks and never do anything.
What I do not like is cutting a caladium tuber into many tiny pieces just to make more plants. A tiny piece may look usable if it has a small eye, but it may not have enough stored energy or roots to grow strongly. Those weak pieces are also more likely to dry out, stall, or rot after potting.
For me, the order of preference is simple:
- Best option: separate rooted shoots with visible growth points.
- Second option: cut a firm tuber only when the eyes are clear.
- Avoid: tiny pieces with no roots, no obvious eye, or very little tuber tissue.
Method 1: Separating Rooted Caladium Shoots
This is the method I feel safest using when a caladium has already made several growing sections on its own. I am not really forcing the plant apart at that point. I am just separating shoots that already have a start.
When I Choose This Method
Sometimes a pot looks simple from above. I may only see a few leaves and assume they are all coming from one tuber. But once I unpot the plant and loosen the soil, I sometimes find a much more crowded structure underneath.
A large caladium tuber can send out several shoots from different points. Each shoot may have its own base, its own growing point, and some roots starting around it. When I see that, I treat those shoots as possible divisions.
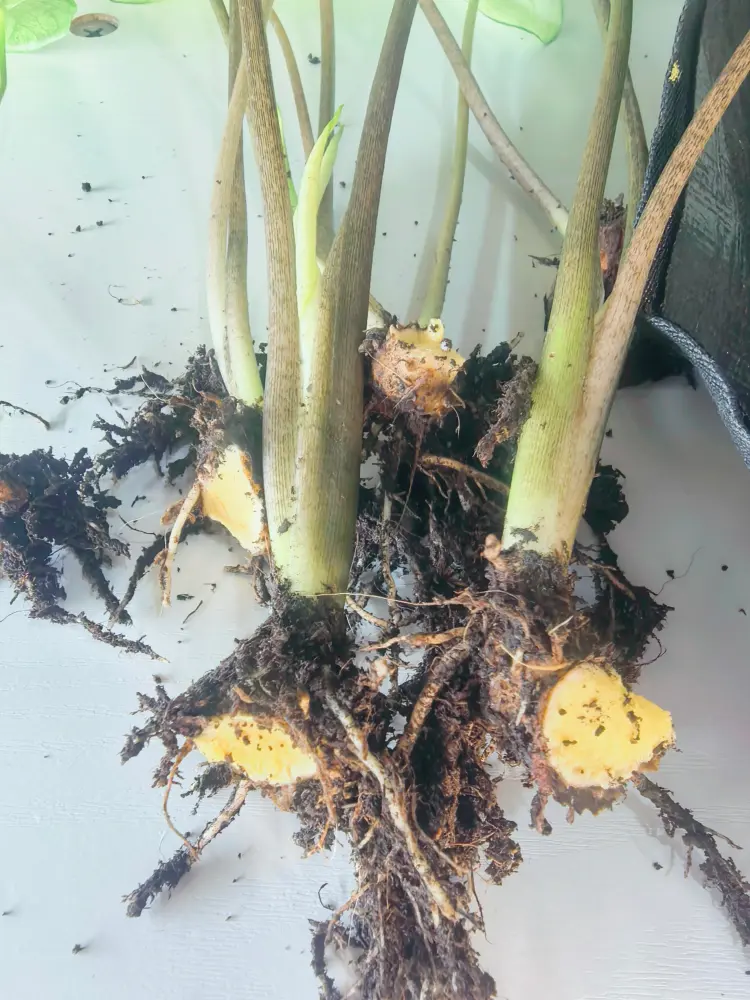
This is different from cutting a bare tuber into pieces. If a shoot already has roots attached, it has a better chance of settling into its own pot. I still want to see a clear growing point, but I feel much more confident when the division is not starting with only a cut surface and no roots.
How I Separate Them
I start by taking the whole plant out of the pot and removing soil slowly. I do not pull the shoots apart right away, because it is easy to snap roots before I understand how everything is connected.
Once I can see the structure, I look for natural separation points. Some shoots almost loosen by themselves when the soil is removed. If a section has its own roots and a clear base, I gently work it apart with my fingers.
If the connection is too tight, I use a clean, sharp knife instead of forcing it. I try to keep the cut as small and clean as possible. My goal is not to make the division look perfect, but to keep each section with a growing point, some roots, and a little tuber tissue if possible.
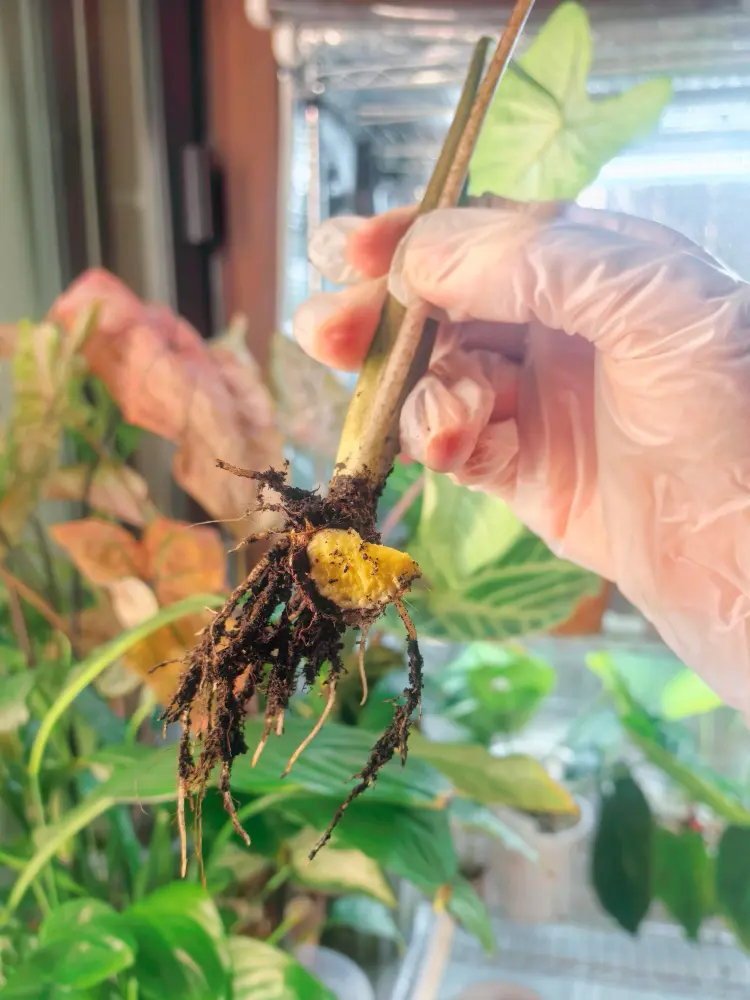
After separating them, I do not rush the new divisions into a large wet pot. Even rooted shoots need a gentler start after being disturbed. I keep the pot size reasonable, use a loose mix, and let the roots recover before treating them like fully established plants.
Why I Prefer This Over Cutting
I prefer separating rooted shoots because the plant has already done part of the work for me. A rooted shoot is not just a random piece of tuber. It already has a direction of growth, some roots, and a better chance of continuing without a long pause.
Cut tuber pieces can work, but they start with a fresh wound and usually need more careful conditions. When I have both options, I choose the rooted shoots first. I would rather divide fewer sections that already look ready than cut a healthy tuber into many weaker pieces just to make more pots.
Method 2: Cutting a Caladium Tuber
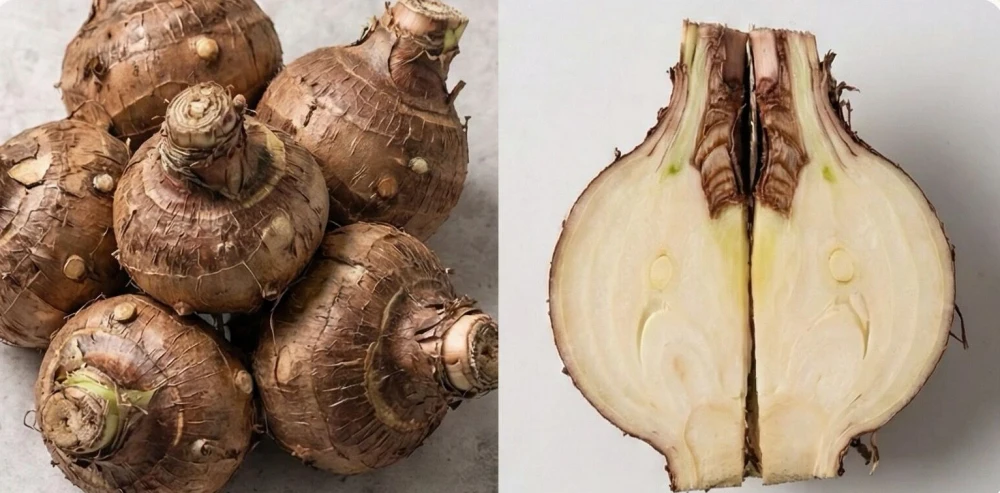
Cutting the tuber is the method I use more carefully. I do not see it as the first option if the plant already has rooted shoots that can be separated. But if the tuber is large, firm, and has several clear eyes, cutting can work.
When I Would Cut the Tuber
I would only cut a caladium tuber when it looks healthy and solid. If the tuber feels soft, hollow, wrinkled, or already questionable, I would not use it for normal propagation. Cutting adds a wound, and a weak tuber may not have enough strength to recover from that.
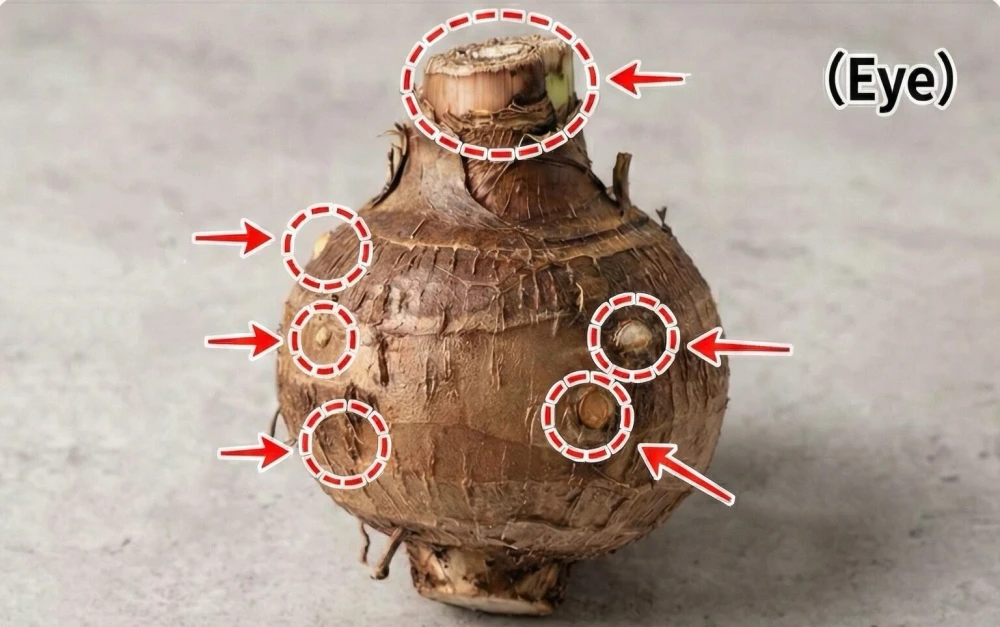
The other thing I look for is clear growth points. I want to see more than one eye or swelling point on the tuber before I even think about cutting it. If I cannot tell where the plant will grow from, I would rather wait than guess.
I am also more likely to cut the tuber when there are no natural rooted shoots to separate. If the plant has already made separate rooted sections, I prefer that method first. Cutting is more useful when the tuber is healthy and has several separate growth points, but has not formed rooted shoots that can be pulled apart naturally.
How I Cut It
Before cutting, I look over the tuber from different angles and decide where each piece would be. I want every section to have at least one healthy eye or growth point. I do not cut first and hope I guessed correctly afterward.
I use a clean, sharp knife or blade. A clean cut matters because a ragged surface gives moisture more places to sit. I try to cut firmly and smoothly instead of sawing back and forth.
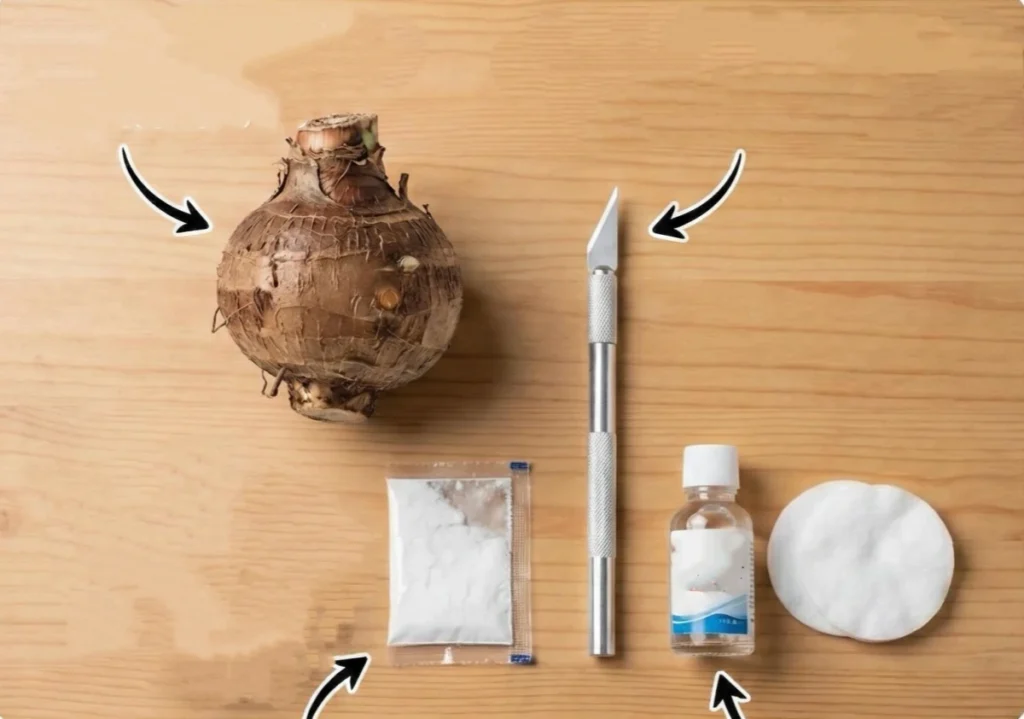
After cutting, I do not pot the pieces immediately into wet soil. I let the cut surfaces dry and callus first. For me, the standard is not only “wait one day” or “wait two days.” I look at the cut itself. It should no longer look fresh, wet, or soft. It should feel dry on the surface before I plant it.
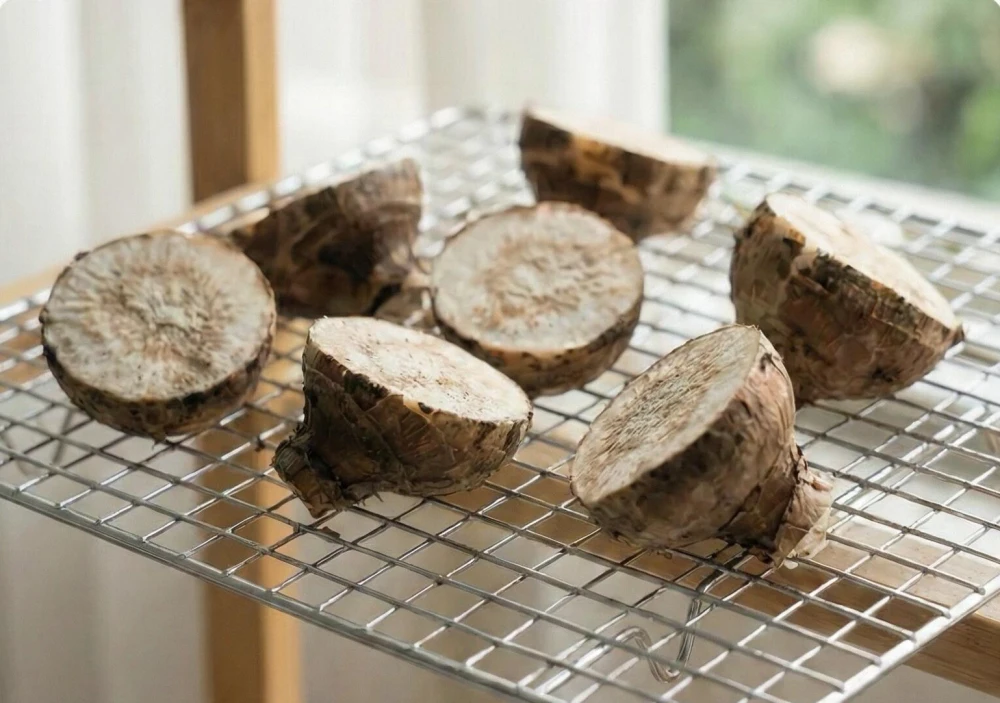
If I use anything on the cut, I would choose a very light dusting of garden sulfur or a dry fungicide powder labeled for bulbs or tubers. But I do not treat that as required. For me, a clean cut and enough drying time matter more than adding powder.
Why I Do Not Cut Too Small
I do not cut caladium tubers into tiny pieces. A small piece may have an eye, but it may not have enough stored energy to grow strongly.
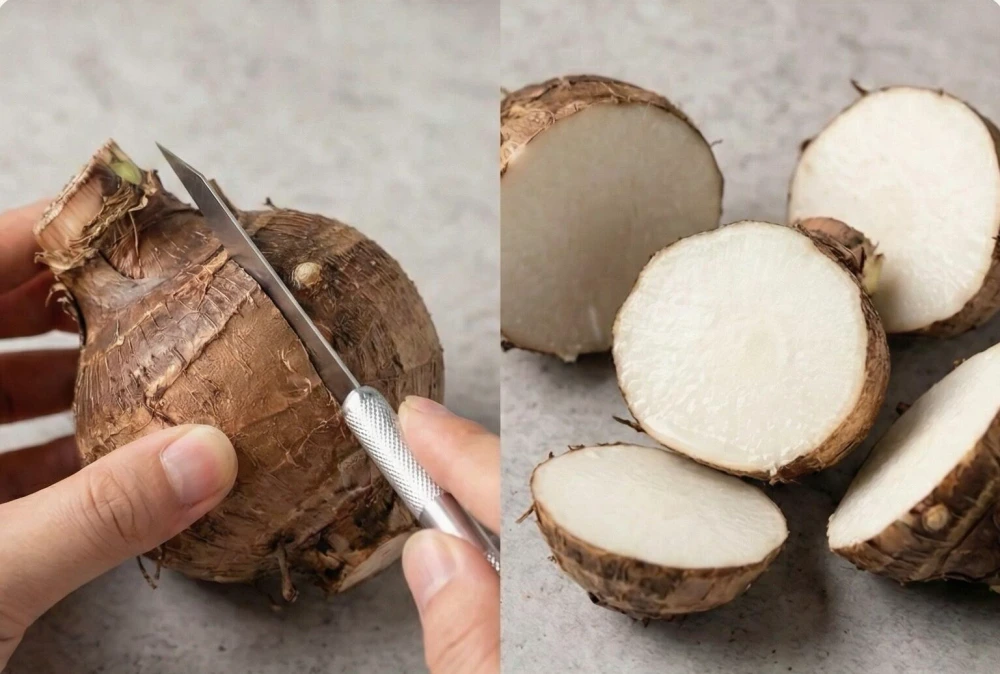
This is also why I pay attention to caladium bulb size and leaf size. A larger piece usually has more stored energy to push steady roots and leaves after division.
This is one of the easiest mistakes to make when trying to get more plants. It feels satisfying to turn one tuber into many pieces, but the weakest pieces are usually the first ones to stall, dry out, or rot. They may sprout a little, but they often do not have enough strength to push steady leaves and roots.
For indoor growing, I would rather have fewer divisions that are larger and more reliable. A piece with a clear eye, enough tuber tissue, and a clean healed cut is much more useful than several tiny pieces that need perfect conditions just to survive.
How I Pot New Caladium Divisions
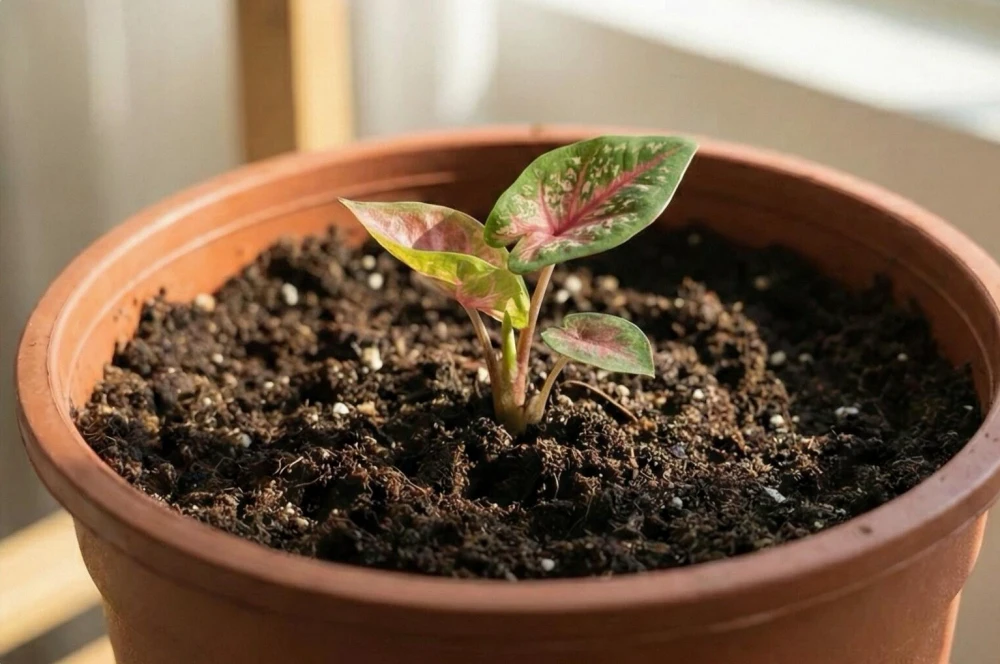
After separating rooted shoots or cutting a tuber, I do not treat the new pieces like established caladiums right away. They may have growth points, and some may already have roots, but they have still been disturbed. At this stage, I want the setup to be gentle, warm, and breathable.
I usually choose a smaller pot rather than giving each division a large container. A fresh division does not need a deep pot full of wet soil. If the root system is still small, too much soil around it can stay damp for too long, especially indoors.
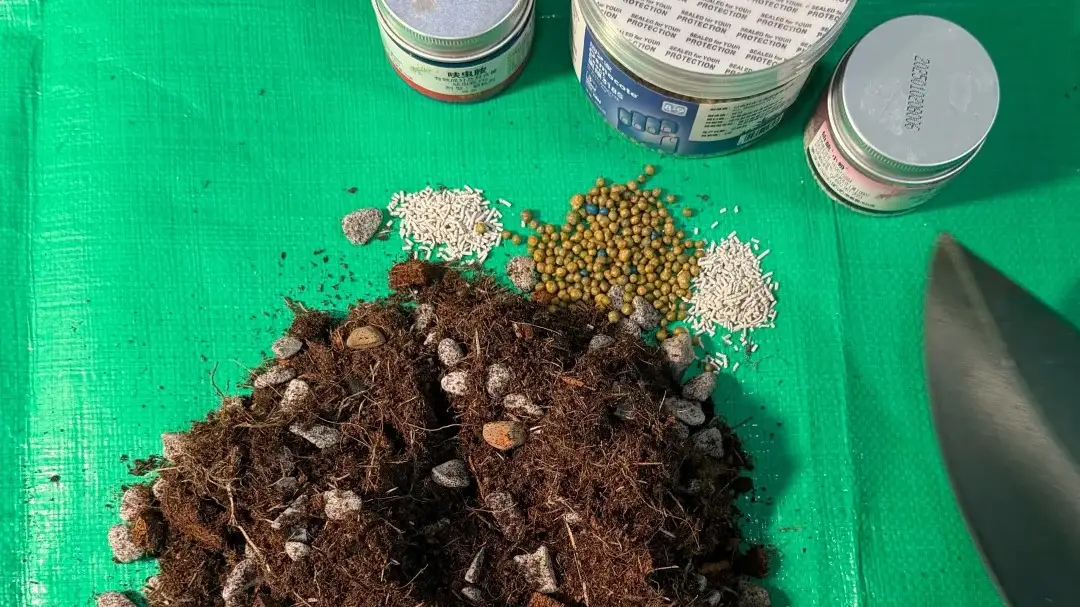
For the mix, I use something light, loose, and slightly moisture-retentive. I want the soil to hold a little moisture, but I do not want it to feel heavy or muddy around the cut surface or young roots. This is the same reason I prefer a chunky indoor mix instead of straight potting soil. I explained that balance more in my guide to the best soil for caladiums.
When I pot the division, I keep the growing point facing up if I can clearly see it. If the shape is confusing, I would rather place the tuber sideways than force it into a direction I am not sure about. I use the same judgment I explained in my guide on which way up to plant caladium bulbs. The new shoot will usually find its way upward if the tuber is not buried too deeply.
I cover the tuber lightly, usually about 1 inch / 2–3 cm of soil over the top. I do not bury new divisions too deep, especially if they were recently cut. Deep planting plus wet soil can make it harder for the piece to dry and breathe. For a fuller planting setup, I would compare it with my guide on how to plant caladium bulbs.
After potting, I keep the mix lightly moist, not wet. This is where I try to be patient. I do not soak the pot again and again just because I want to see new growth faster. Warmth, bright indirect light, and a breathable mix usually do more for a fresh division than heavy watering.
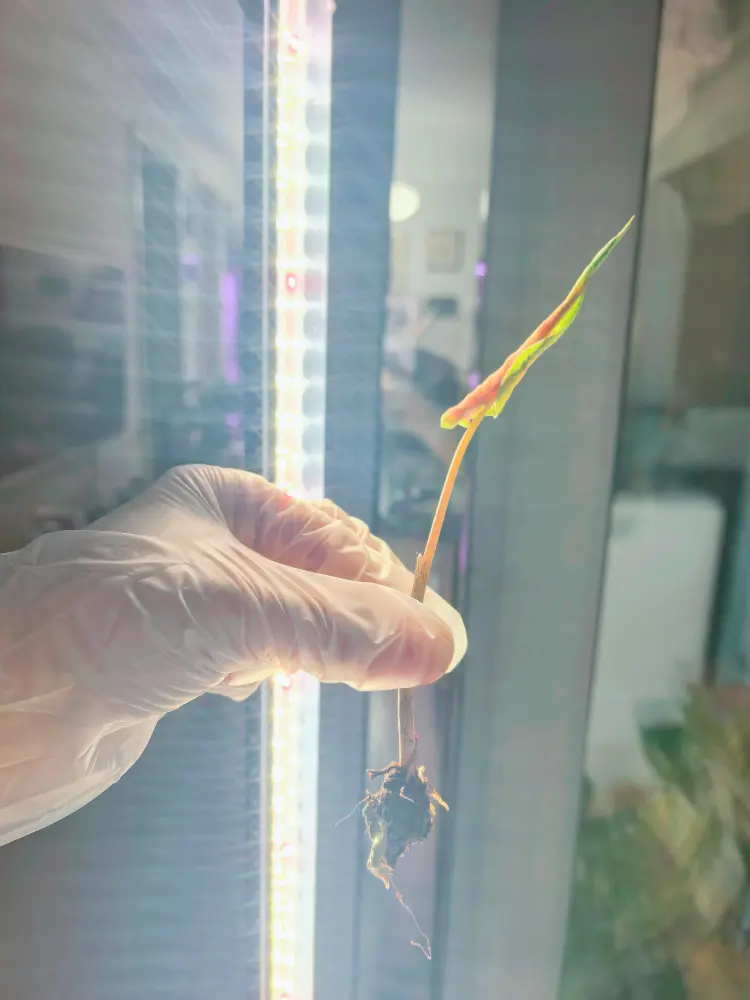
Once I see stronger roots, firmer shoots, or new leaves opening steadily, I start treating the plant more like a normal growing caladium. Before that, I keep the care a little more cautious. The goal is not to push fast growth immediately, but to help the division settle in without rotting.
What Usually Goes Wrong After Propagation
Most failed caladium divisions do not fail because propagation is impossible. They usually fail because the piece was too weak, the cut was too fresh, or the potting setup stayed too wet for too long. I try to look at these problems separately, because they are easy to mix together.
The first problem is dividing a piece that has no real growing point. A chunk of tuber can look firm and healthy, but if it has no visible eye, no shoot, and no active point where growth can start, I do not expect it to become a new plant. It may sit in the pot for a while, but there is nothing reliable for the plant to grow from. If the piece stays firm but does not move for weeks, I would compare the setup with the same checks I use for caladium bulbs not sprouting.
The second mistake is cutting the tuber too small. I understand the temptation, especially when one large tuber looks like it could become many plants. But a tiny piece has very little stored energy. Even if it has an eye, it may only produce weak growth, or it may stall before the roots are strong enough to support it.
Another problem is treating a rootless piece like an established young plant. A rooted shoot can recover much more easily because it already has a way to take up water. A cut tuber piece without roots has to heal, stay firm, and start rooting before it can grow well. If I water it like an established caladium, I am usually creating more risk than support.
Fresh cuts are also vulnerable. If I pot a newly cut tuber while the surface still looks wet and raw, the chance of rot goes up. I prefer to let the cut surface dry and callus first. I do not judge this only by time. I look at the cut itself. If it still looks fresh, soft, or damp, I wait longer.
Soil, pot size, and temperature can make the problem worse. A large pot full of wet mix may seem generous, but a new division cannot use that much moisture yet. If the room is cool, the soil stays damp even longer, and the tuber can soften before it has a chance to root. For fresh divisions, I would rather use a smaller pot, a loose mix, and steady warmth.
The last mistake is checking and watering too often because nothing is happening yet. I have done this before, and it usually makes the situation worse. A fresh division needs time to settle. I keep the mix lightly moist, give it warmth and bright indirect light, and then wait for signs of real growth instead of trying to force it with water.
I Would Rather Make Fewer Strong Divisions
I do not divide caladiums just to get the highest number of new pots. It is tempting, especially when one large tuber looks like it could be turned into many pieces, but I have learned to be more conservative with it.
If I can separate rooted shoots, I choose that first. Those sections already have a growing point and some roots, so they are not starting from a bare cut surface. They usually feel less risky to me than small tuber pieces that still need to heal, root, and start growing all at once.
Cutting the tuber can work, but I only do it when the tuber is firm, healthy, and the eyes are clear. I do not like guessing where the growth will come from, and I do not like cutting a good tuber into tiny pieces just because it is technically possible.
For indoor growing, fewer strong divisions are usually worth more than many weak ones. A larger piece with roots, a clear growth point, and enough stored energy has a much better chance of settling in. I would rather end up with three or four steady plants than ten small pieces that need perfect conditions just to survive.
FAQ
Still unsure how to care for your caladiums overall?
If questions about watering, sprouting, bulb health, or leaf behavior keep coming up, I’ve gathered all my real-world care observations in one place — organized by growth stage and common problems.
Explore the Caladium Care Guide →