I used to be cautious about growing caladiums in water. Because caladiums grow from tubers, my first worry was always rot. In soil, I can control moisture with the potting mix and the pot size. In water, it felt easier to make one small mistake and keep the tuber too wet for too long.
But after I started keeping more water-grown plants on my desk, I became curious. I wanted to see whether a caladium started in a water-based setup from the beginning would adapt better than one moved later from soil. So I tried two different cases: a Strawberry Star tuber started in a net-pot water setup, and a struggling Caladium Heart to Heart® ‘Splash of Wine’ that had never looked happy in soil.
The results surprised me. Strawberry Star rooted much faster than I expected, and the Splash of Wine improved so much after moving out of soil that it changed the way I think about water-growing caladiums. I still do not treat water as a risk-free method, but I am much more open to it now than I was before.
Quick Answer: Can Caladiums Grow in Water?
Yes, caladiums can grow in water or semi-hydro setups, but I would not treat it as a no-risk method. The key is not simply putting a caladium tuber into water. The water level, tuber firmness, root growth, warmth, and cleanliness all matter.
I feel safest when the water level stays low and the roots grow down into the water, while the main tuber is not kept fully submerged. My basic rule is simple: roots in water, not the whole tuber sitting underwater.
I also wait before adding fertilizer. Before roots appear, fertilizer does not help much and can make the water harder to manage. Once new water roots are growing, I start with a very weak hydroponic fertilizer or diluted liquid fertilizer. This is the same cautious approach I use when I fertilize caladiums in regular pots. My Strawberry Star rooted very quickly, but other tubers moved more slowly, so I would treat fast rooting as possible, not guaranteed.
Case 1: Starting Strawberry Star in a Net-Pot Water Setup
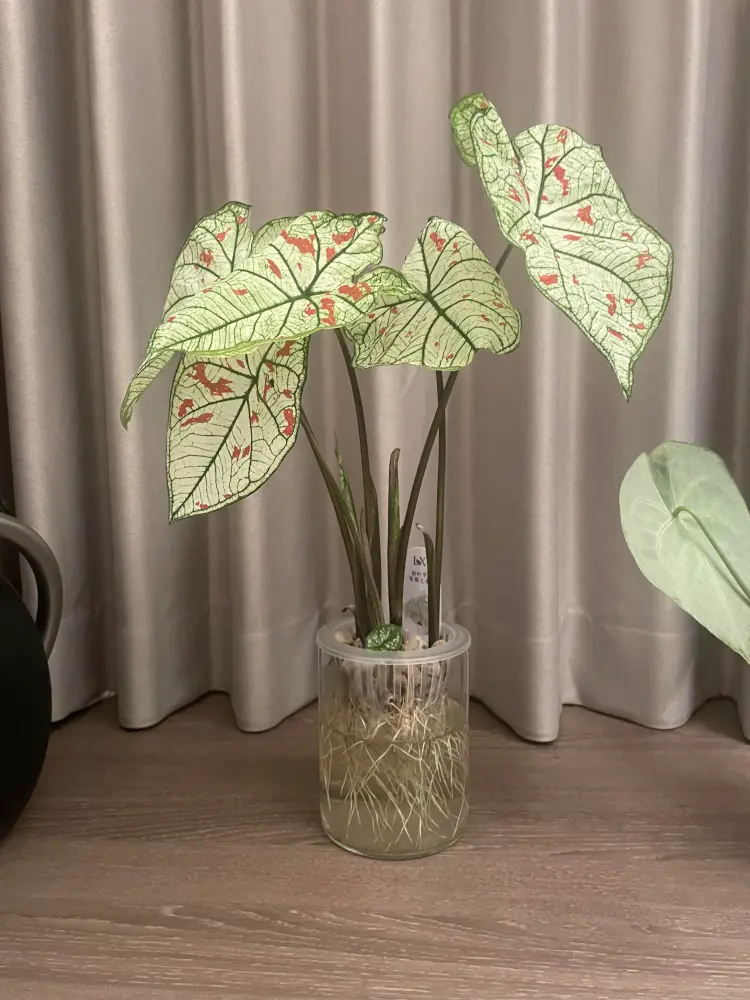
The fastest response I saw came from Strawberry Star. I started this one from a tuber, not from an already established plant. That made the result more interesting to me, because I wanted to see whether a caladium could adapt to a water-based setup from the beginning.
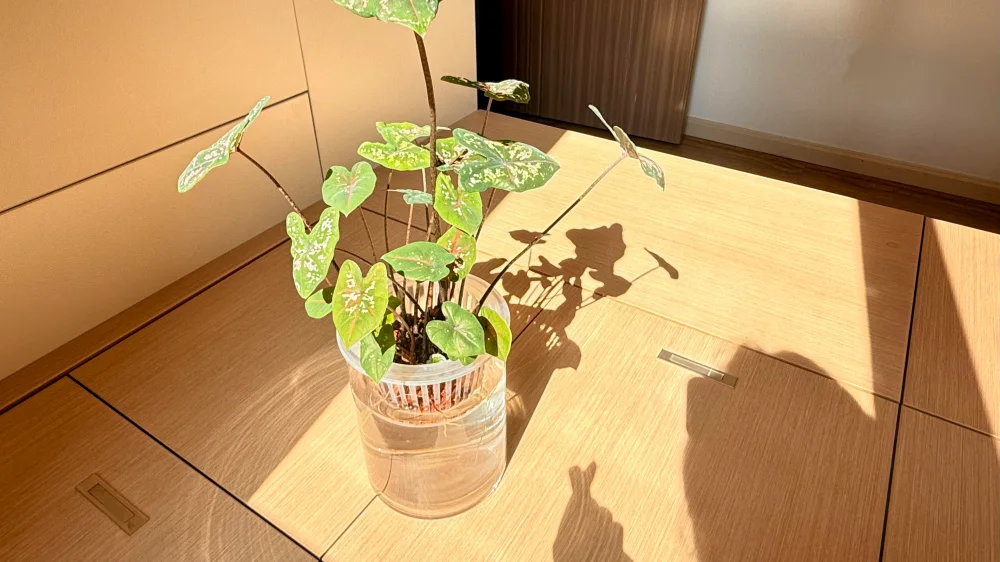
For this case, I used a net-pot water setup. The tuber was held above the water reservoir instead of being dropped fully into water. I kept the water level low, just enough for the bottom area to stay close to moisture and for new roots to grow downward into the water.
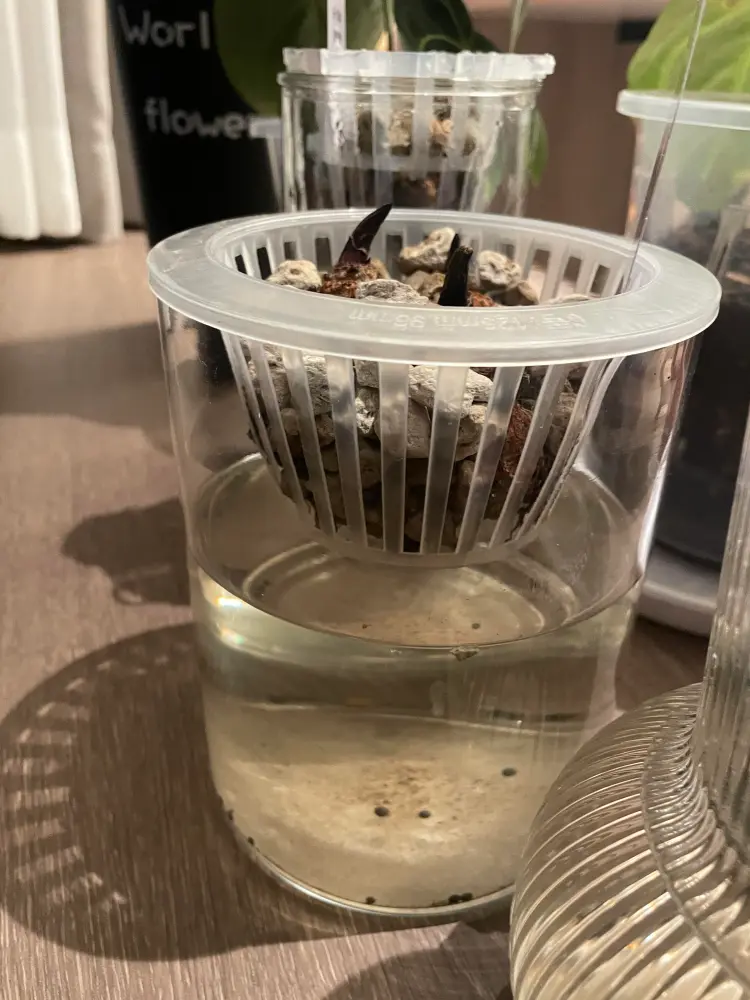
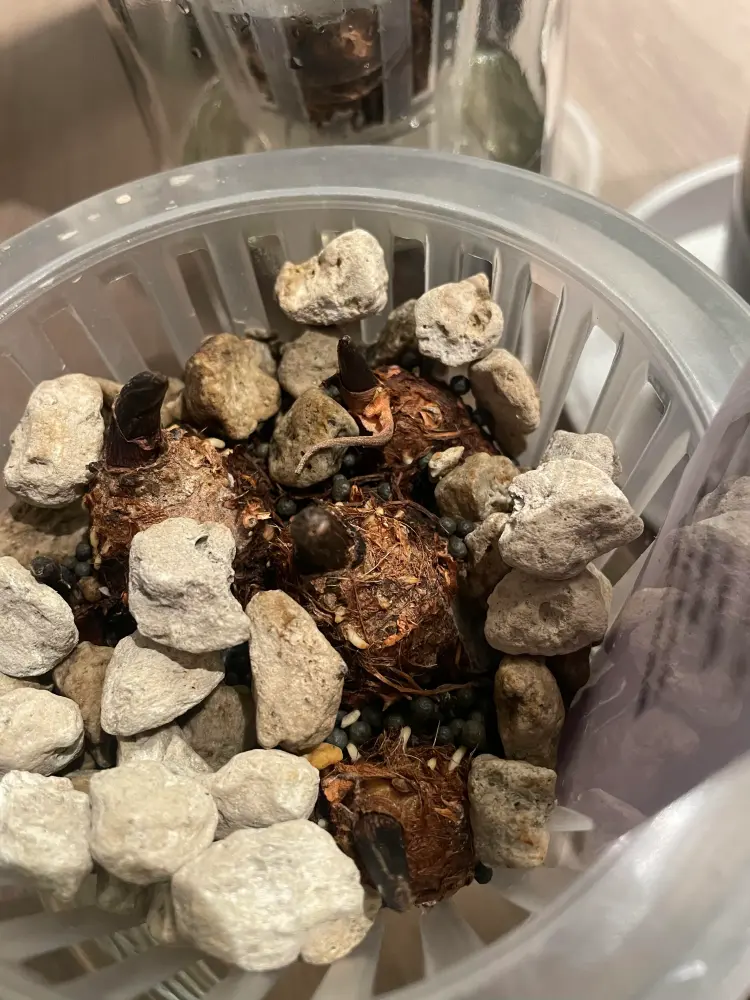
I did not add fertilizer at the beginning. At that stage, the tuber had not formed enough active roots yet, so I focused on warmth, clean water, and keeping the water level controlled. I wanted the roots to find the water, not the whole tuber to sit soaked.
| Day | What I Noticed |
|---|---|
| Day 0 | The tuber was placed above the water reservoir in a net-pot setup. |
| Around Day 3 | The first leaf started to emerge much faster than I expected. |
| Around Day 5 | Fine feeder roots began forming from the new water roots. |
| Day 15 | The plant looked different almost every day, with visible root and leaf progress. |
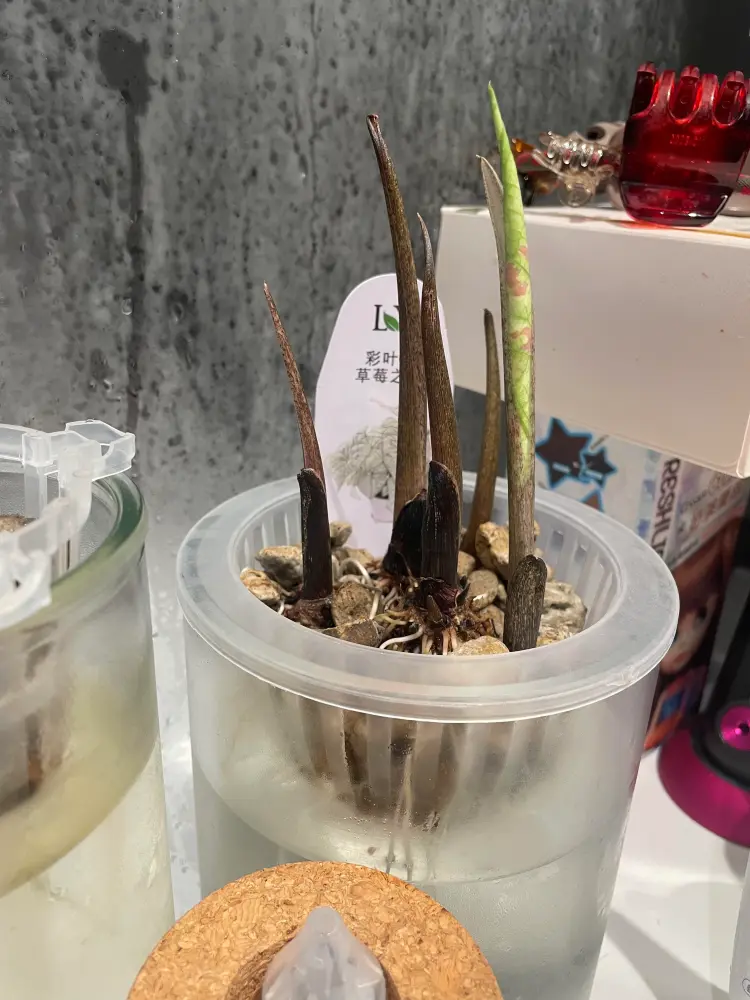
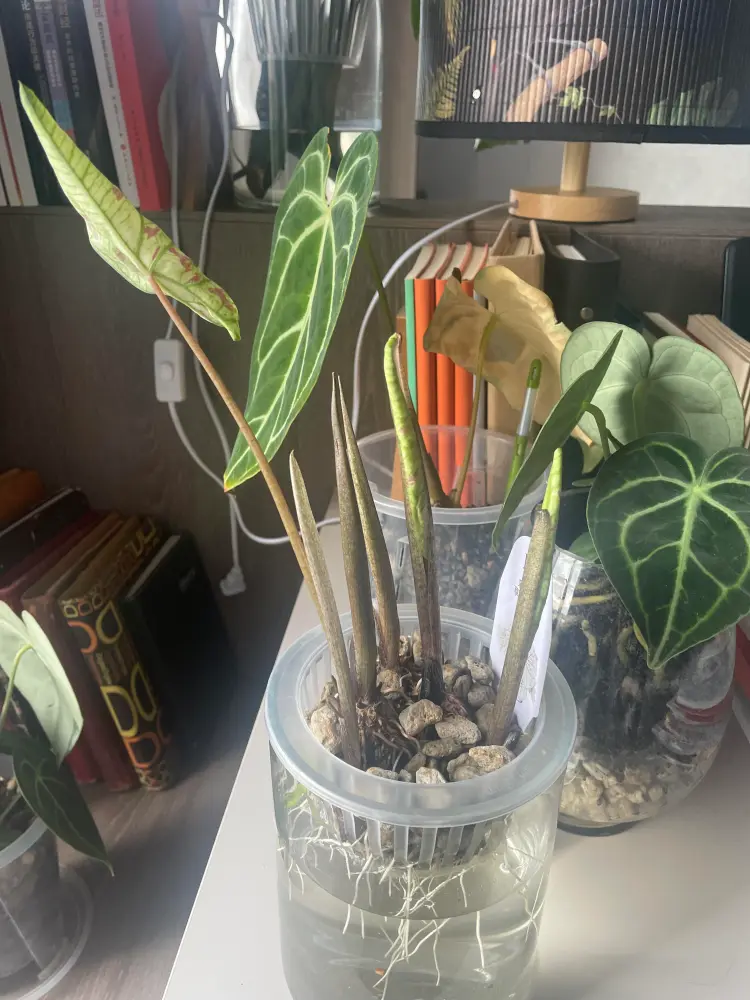
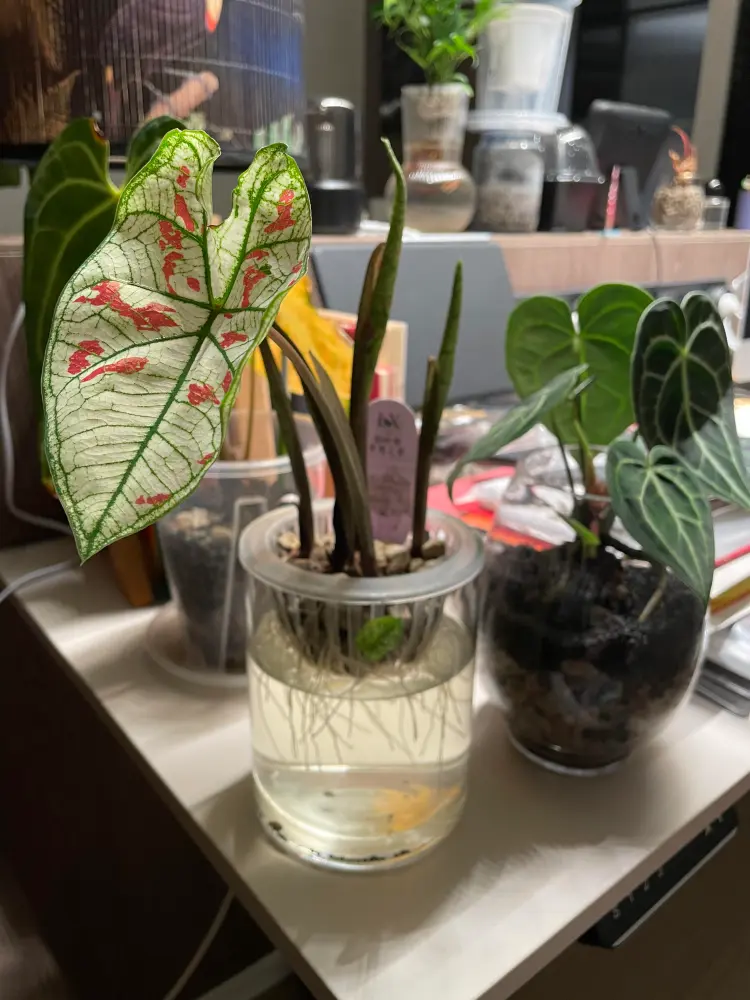
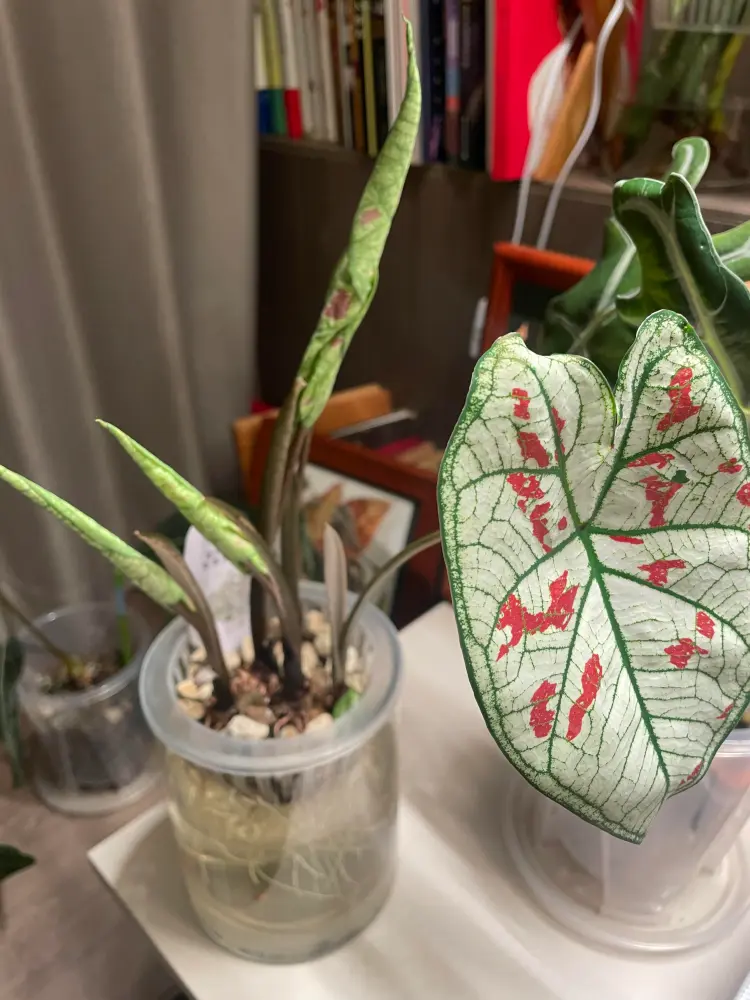
This case taught me that a healthy caladium tuber can adapt quickly when the setup is warm, clean, and not too wet around the tuber itself. The low water level felt important because it let the roots grow toward water without keeping the whole tuber submerged. Still, I would not use this one case as a guarantee. Other tubers I started around the same time moved more slowly, and I would still check the usual reasons for caladium bulbs not sprouting before assuming a tuber simply needs water culture.
Case 2: Moving Splash of Wine From Soil to Glass-Bottle Water Culture
The second case was very different from Strawberry Star. This was not a fresh tuber that started cleanly in water from the beginning. It was a Splash of Wine that had been struggling in soil for a while.
In soil, this plant never looked settled. The leaves kept getting crispy edges, the older leaves looked damaged, and at one point there was almost no clean leaf left on the plant. I could not say the plant was completely failing, but it never looked comfortable either. That was what made me curious about moving it into water.
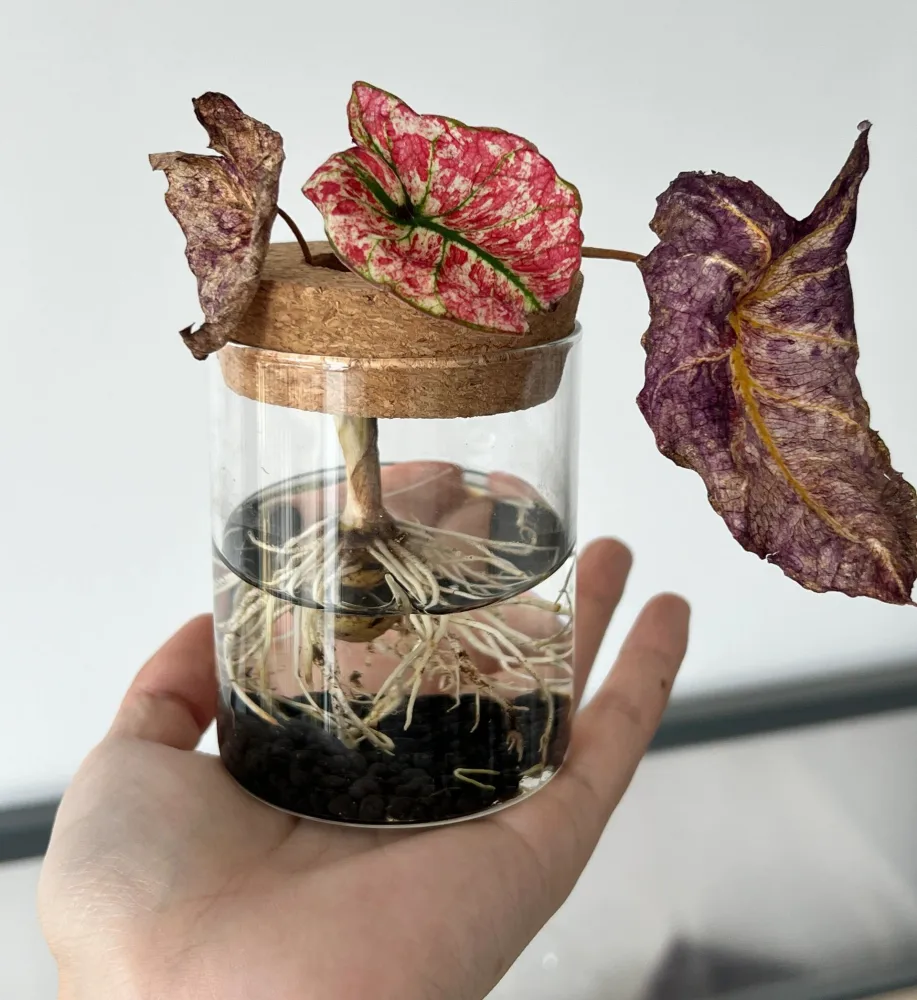
For this one, I used a simple glass-bottle water culture setup. The roots were visible, the water level was easy to check, and I could watch the plant more closely than I could in soil. In less than two months, the change was much better than I expected. The new growth looked cleaner, the plant looked more stable, and overall it looked better than it had in soil.
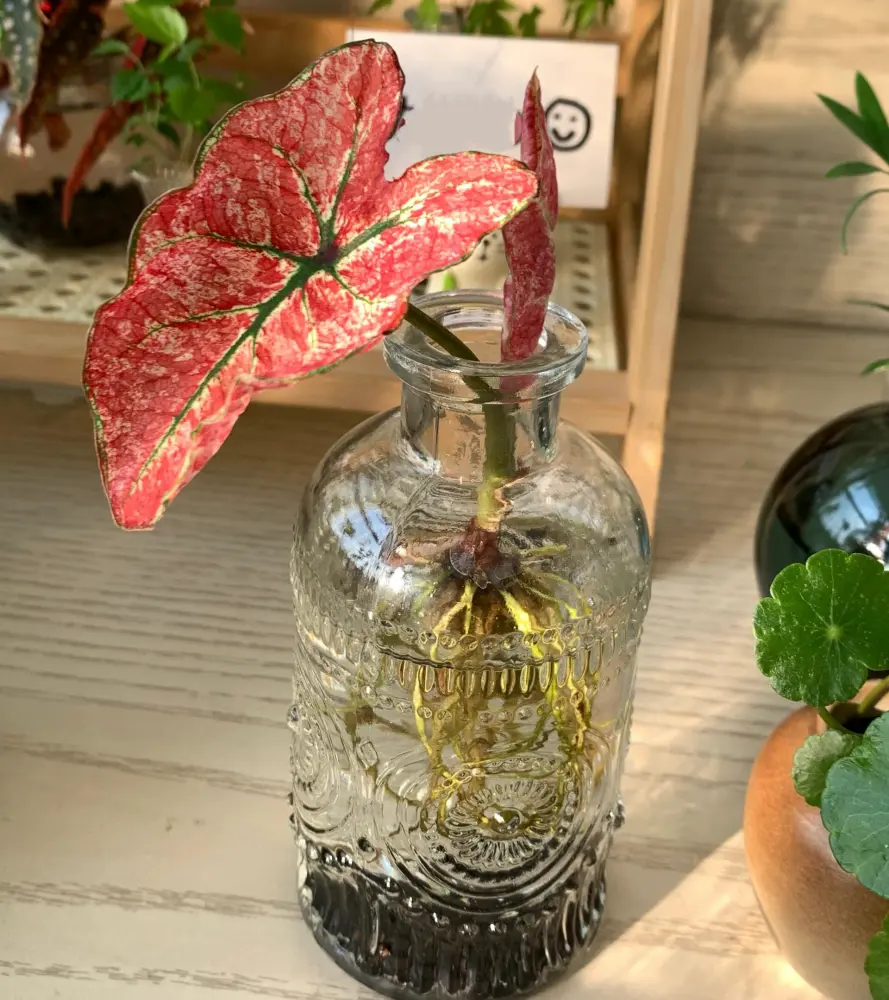
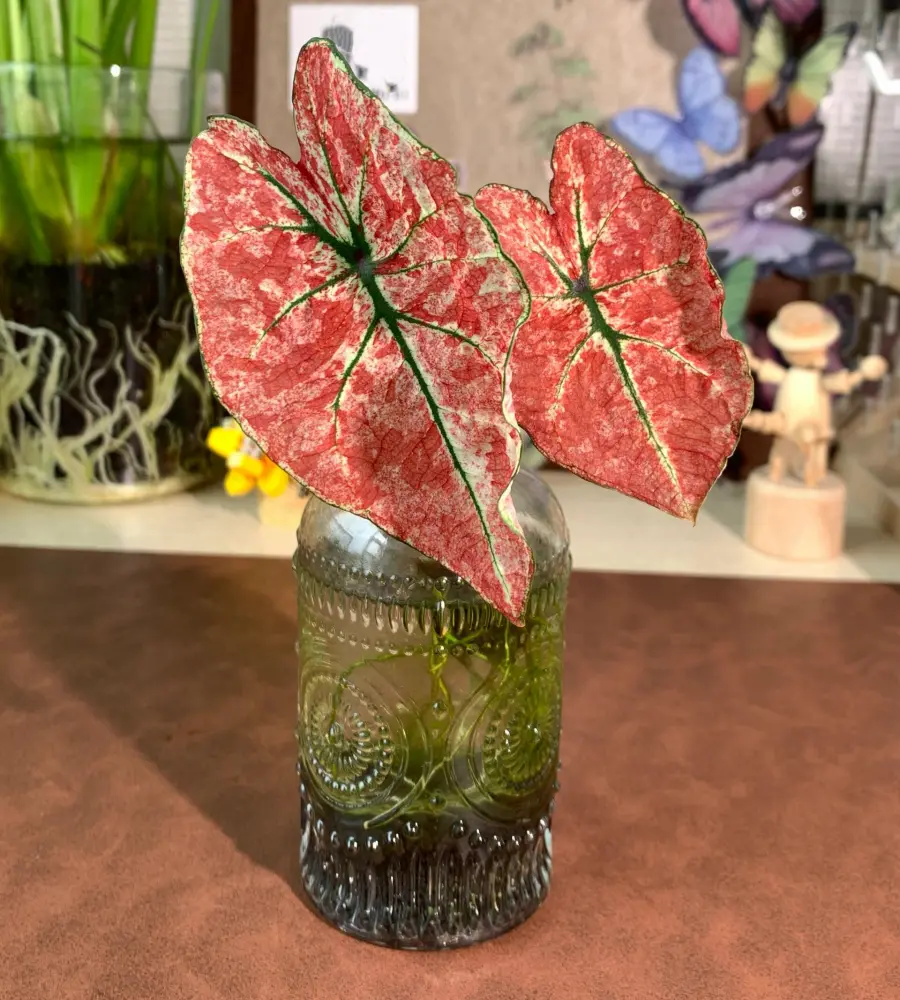
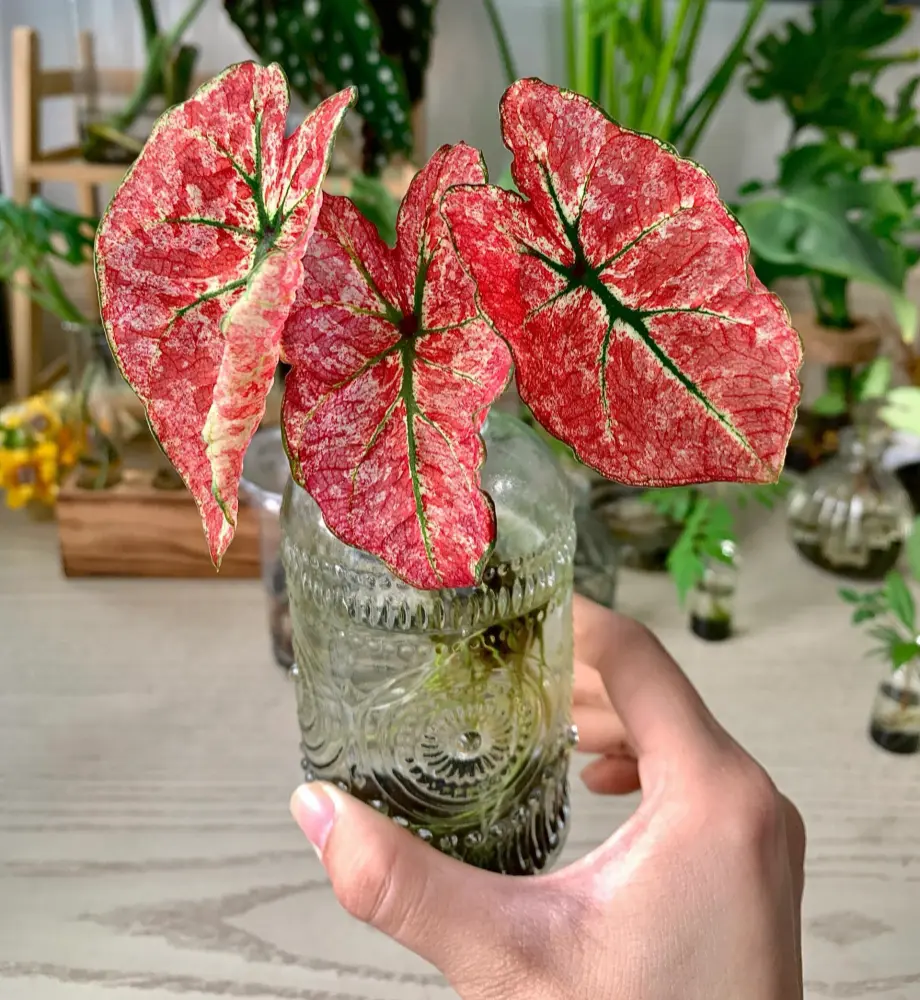
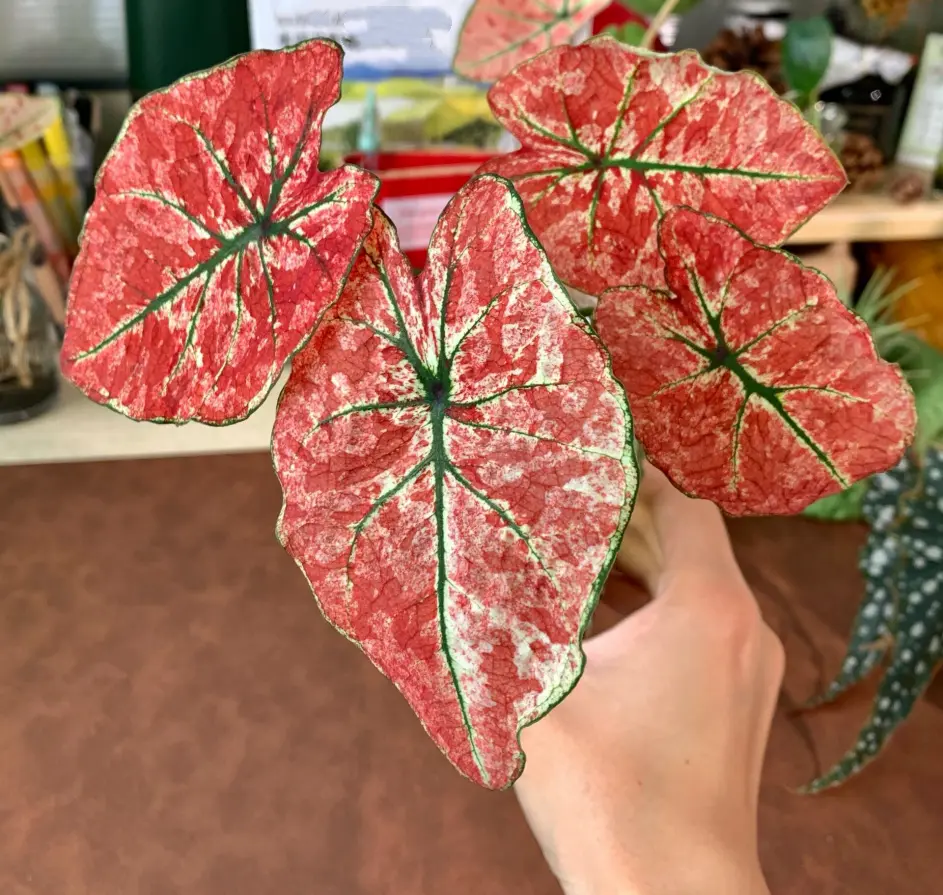
I think the biggest difference was the root zone. In soil, the plant may have been dealing with uneven moisture or root stress, even though I usually try to use a loose caladium soil mix for indoor pots. In water, the roots were easier to see, the moisture level was more predictable, and I could adjust before the plant declined again.
But I would still watch this kind of transition carefully. Old soil roots do not always behave well after moving into water. Some may soften or decay as the plant adjusts, so I remove anything mushy or rotting instead of leaving it in the bottle. I also check the tuber regularly. If the tuber starts feeling soft, or if the water smells bad, I treat that as a warning sign.
I also do not feed heavily right away. Even if the plant looks better in water, I wait for active water roots before using a very weak liquid fertilizer. For me, this case made water culture feel much more useful, but not careless. It worked because the setup stayed clean, the plant still had enough strength to recover, and I kept watching the roots instead of assuming water would fix everything by itself.
My Basic Rules for Water-Growing Caladiums
After trying both setups, I do not think growing caladiums in water is difficult, but I also do not treat it casually. A caladium is still a tuber plant, not a true aquatic plant, so I pay close attention to water level, roots, temperature, and cleanliness.
Keep the tuber above the water when possible
When I start a tuber in a water-based setup, I try to keep the water level low. I want the roots to grow down into the water, not the whole tuber sitting underwater before it has active roots. This is different from regular pot watering, but the same idea still applies: moisture should support the roots, not keep the tuber constantly wet. I explain that balance more in my guide on how to water caladiums.
For an already rooted plant in a bottle, I still watch the water line. The roots need access to water, but if the base or tuber starts to soften, I lower the water level and check the roots.
Wait for roots before feeding
I do not add fertilizer before the plant has active roots. A tuber with no roots cannot use fertilizer well, and in water there is no potting mix to buffer the concentration.
Once I see new water roots growing, I start very lightly with a weak hydroponic fertilizer or diluted liquid fertilizer. I would rather underfeed at first than make the water too strong.
This is especially important after moving a plant from soil to water. Old soil roots may not all adapt. Some may decay while new water roots form. During that stage, I focus on clean water and root health first. Fertilizer comes later, after the plant shows that it is actually growing.
Keep the setup warm, bright, and clean
Warmth matters more than fertilizer at the beginning. If the room is too cool, a caladium tuber can sit in water without doing much, and the risk of rot goes up. I have better results when the plant is warm enough to stay active.
Light matters too. I use bright indirect light or a grow light, but I avoid placing a water setup where the container heats up too much in direct sun. Warmth helps the tuber grow; overheated water is a different problem. For indoor setups where natural light is weak, I would rather use a controlled grow light for caladiums than rely on hot direct sun through glass.
I change or refresh the water when it starts looking cloudy, smelling off, or collecting too much debris. Clear containers make roots easy to watch, but they can also grow algae more easily. A little algae does not always mean the plant is failing, but it tells me the setup needs attention.
The three things I check most often are simple: water smell, root color, and tuber firmness. Clean roots, firm tubers, and steady new growth tell me the setup is working. Soft tissue, bad smell, or cloudy water tell me to adjust before the plant declines.
What Can Go Wrong With Caladiums in Water
Water-grown caladiums can look clean and simple when the setup works, but problems can happen quickly. I pay attention to small warning signs instead of assuming the plant is safe just because the leaves still look fine. If the whole plant starts declining, I use the same early-check mindset I described in how I tell whether a caladium is dying.
The two warning signs I take most seriously are a soft tuber and bad-smelling water. If the tuber starts to feel soft, hollow, or mushy, I lower the water level and check whether too much of the tuber has been staying wet. If the water smells sour or rotten, something is usually decaying below the surface, such as an old root, damaged tuber tissue, or trapped debris.
Plants moved from soil to water need extra attention. Old soil roots may not all adapt to water culture. Some roots can soften or rot while the plant grows new water roots. I do not panic if a few old roots decline, but I remove soft or dark decaying roots so they do not foul the water.
Clear containers are useful because I can see the roots, but they also make algae more likely. A little algae is not always a disaster, but too much algae can make the setup messy and harder to monitor. If it becomes a problem, I clean the container more often or reduce light hitting the water directly.
Sometimes the leaves keep growing, but the roots do not look strong. That tells me the setup may not be balanced yet. The plant may be using stored energy from the tuber while the root system is still weak. In that case, I avoid strong fertilizer and focus on warmth, clean water, and a steady water level.
The two mistakes I try hardest to avoid are keeping the water too high and feeding too early. A high water level can keep the tuber too wet, and strong fertilizer in water has very little buffer. With caladiums, I would rather start too cautiously than lose a tuber by trying to make it grow faster.
I Am More Open to Growing Caladiums in Water Now
I am more open to growing caladiums in water now, but I still would not move every caladium out of soil just to experiment. If a plant is already growing well in a loose, breathable potting mix, I usually leave it alone.
Water growing interests me most in two situations: when I want to start a firm tuber in a controlled setup from the beginning, or when a plant keeps struggling in soil even after I adjust watering, light, and mix. Strawberry Star showed me that a healthy tuber can adapt to a net-pot water setup quickly. Splash of Wine showed me that a soil-grown caladium with crispy, unhappy leaves may recover better when the root zone becomes cleaner and easier to observe.
But I do not think the lesson is “more water is better.” The setup worked because the water level was controlled, the tuber stayed firm, the roots had access to oxygen, and I waited for active roots before feeding.
For me, growing caladiums in water is not about ignoring the tuber’s limits. It is about giving the roots a cleaner, more stable setup and watching closely enough to adjust before rot starts.
FAQ
Still unsure how to care for your caladiums overall?
If questions about watering, sprouting, bulb health, or leaf behavior keep coming up, I’ve gathered all my real-world care observations in one place — organized by growth stage and common problems.
Explore the Caladium Care Guide →