Caladium bulbs don’t behave like most garden bulbs. There’s no obvious pointed tip, no clearly flattened base, and no instantly recognizable “up” or “down.” When you first hold one in your hand, it often feels more like a rough, irregular lump than something meant to be planted with precision.
If you search online, you’ll find plenty of advice—look for the bud, check the indent, find the root scars. But for beginners, those explanations rarely translate into confidence. You read the instructions, turn the bulb over a few times, and still hesitate. Every side seems possible. Every choice feels like a guess.
I’ve been there too. I remember rotating a caladium bulb in my hands, comparing it to photos, trying to convince myself that one side looked “more right” than the others. In the end, what stopped me wasn’t a lack of instructions—it was the uncertainty of identification.
This isn’t a planting problem. It’s an identification problem.
If you can’t tell which side is which, no amount of planting advice will actually help.
Why Pictures Matter More Than Descriptions Here
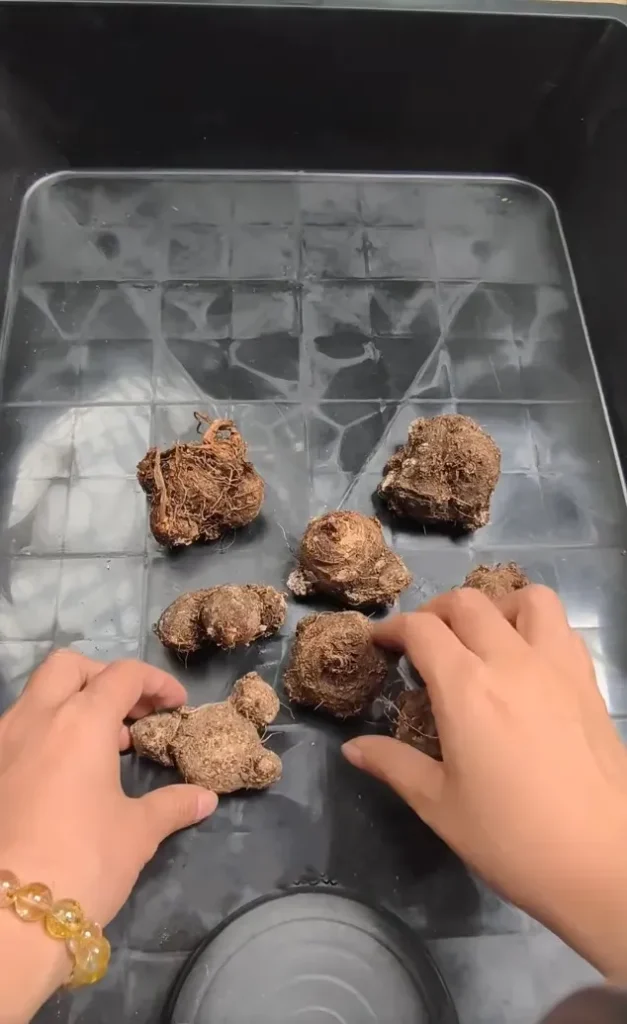
With caladium bulbs, written descriptions only help to a point.
Terms like “the indented side” or “the side with buds” often sound clear—but once you’re holding a real bulb, they’re still hard to apply.
Caladium bulbs come in many shapes, and few of them look textbook-perfect. That’s why the most reliable way to learn isn’t through definitions, but through real examples.
Below, I’ll walk through several actual caladium bulbs—each with a different shape—and show how I identify the correct planting direction in each case.
Once you’ve seen a few real examples, the patterns start to make sense.
Example 1: A Bulb with Several Shallow Pits on One Side
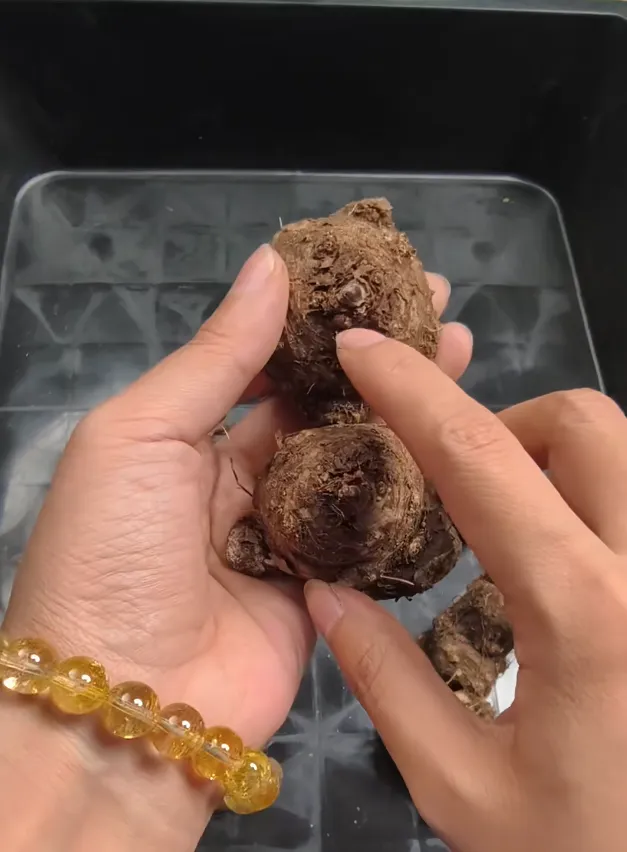
At first glance, this bulb doesn’t have an obvious “top.” Its shape is uneven, and no side looks sharply pointed or cleanly defined.
However, when you rotate it slowly, one surface shows several shallow pits grouped together. Those clustered marks are old growth points, which tells you this is the top. The opposite side is denser and smoother, making it the base.
Example 2: One Clear Growth Point with Smaller Ones Nearby
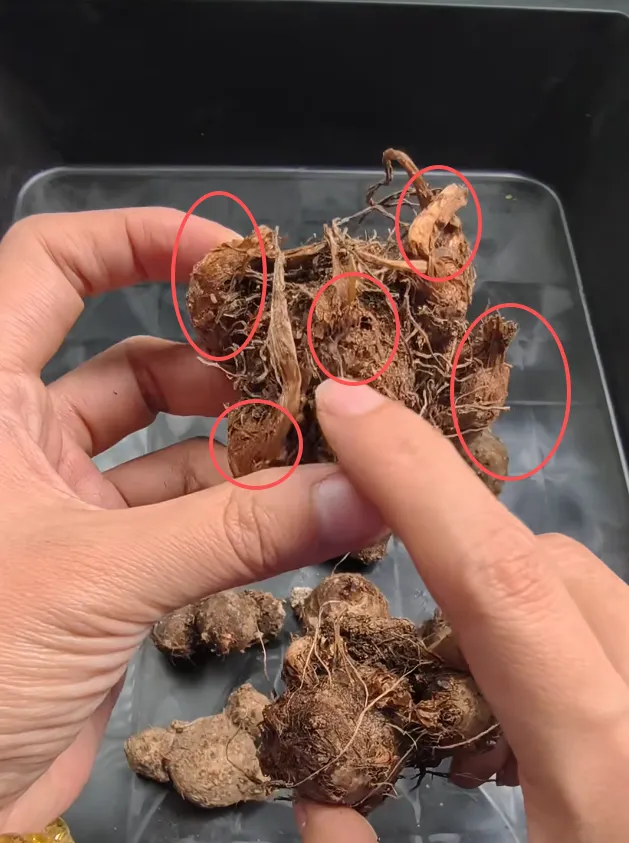
This bulb has one slightly raised spot that stands out once you look closely, with a few smaller bumps around it. It’s easy to overlook because the surface texture is rough and irregular.
What matters here is not height, but pattern. Growth points tend to appear together, so the side with multiple bumps should face upward when planting.
Example 3: A Rounded Side with No Visible Growth Marks
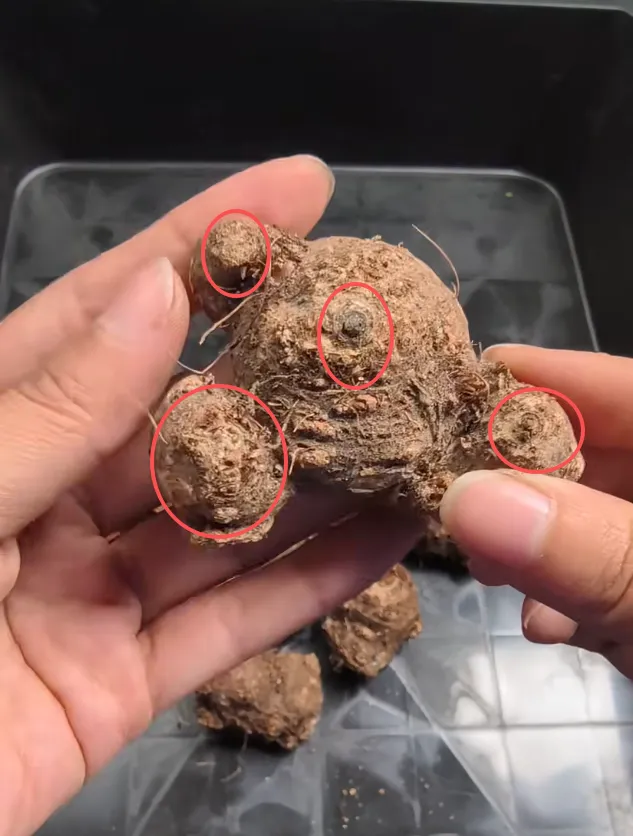
This is a classic example of why caladium bulbs confuse beginners. One side looks smooth, rounded, and almost blank, with no pits or scars at all.
That featureless surface is the base. The top may look less “clean,” but it will always show some trace of previous growth.
Example 4: Growth Points Sitting Off to One Side
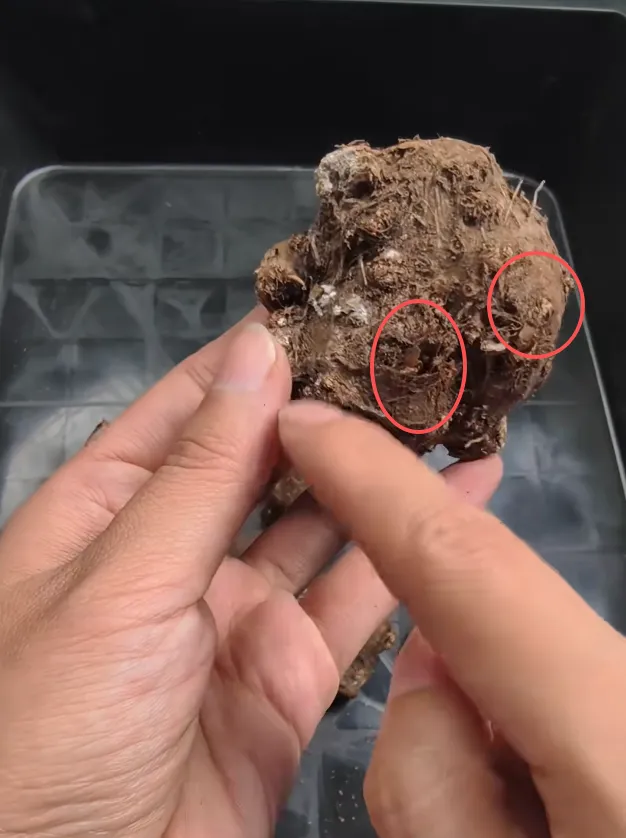
Not all caladium bulbs grow symmetrically. In this example, the growth points are slightly off-center rather than on the highest point of the bulb.
This doesn’t mean the bulb is damaged or incorrectly formed. You should still orient the growth points upward, even if they are angled, as the shoot will correct itself once it starts growing.
Example 5: A Bulb Made of Several Fused Sections
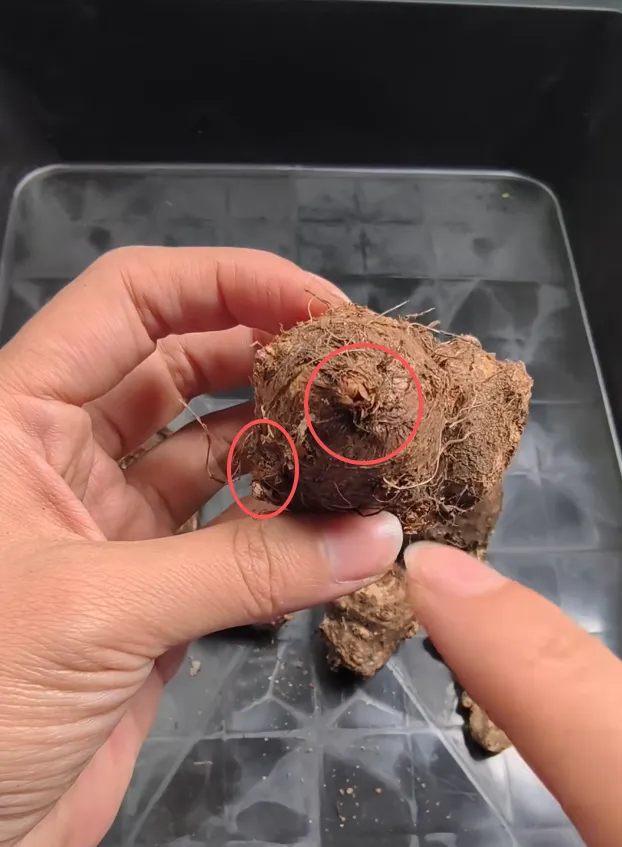
This bulb looks like multiple small bulbs fused together into one irregular mass. Each rounded section shows its own faint growth marks.
That’s a sign of maturity, not a problem. Plant it as a single unit, keeping the side with visible growth points facing up rather than trying to separate it.
Example 6: A Smaller, Dehydrated Bulb with Faint Growth Marks
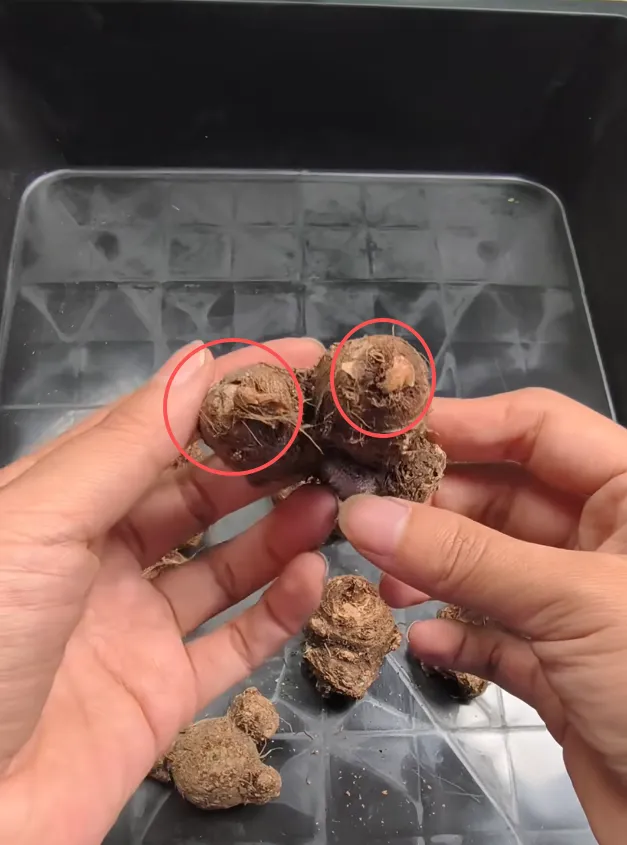
This bulb is noticeably smaller and more shriveled than the others, and its growth points are subtle. You can still spot them as tiny rough scars on one side.
With bulbs in this condition, orientation matters even more. Planting it upside down reduces its chances of recovering, so take extra time to identify the growth side correctly.
The One Rule I Follow Now When Planting Caladium Bulbs
When I’m absolutely sure which side is up, I plant.
When I’m not sure, I don’t guess — I let the bulb show me.
Instead of risking an upside-down planting, I pre-sprout the bulb first. A few days in a warm, lightly humid setup is often enough for the growth point to reveal itself, and once that happens, orientation becomes obvious. Only then do I move the bulb into soil.
This simple shift has saved me from more failed plantings than any “perfect planting depth” advice ever did.
If there’s one thing I’ve learned, it’s this: caladium bulbs don’t need confidence — they need clarity.
FAQ
Still figuring out what’s happening with your caladium bulbs?
If sprouting delays, orientation confusion, or root issues keep coming up, I’ve organized all my real-world bulb observations in one place — from planting direction to recovery strategies.
Explore the Caladium Bulbs Guide →