I used to think there must be a perfect soil recipe for caladiums — the kind of mix where every ingredient had a fixed percentage and every pot would grow well if I followed it closely enough. After growing them indoors for a while, I do not think that way anymore.
Caladiums do not need a complicated collector-style aroid mix, but I also would not plant them in a full pot of fine, heavy potting soil and hope for the best. Indoors, especially in a container, the mix has to do two things at the same time: hold enough moisture for active growth, and still leave enough air around the tuber and young roots.
Now I judge the mix more by how it behaves in the pot. When I water, does the water move through without the whole pot turning heavy? After a few days, does the lower half still feel stale and wet? Those small things tell me more than a perfect ingredient list. For indoor caladiums, I want a mix that stays lightly moist but still gives the tuber room to breathe.
Quick Answer: My Basic Indoor Caladium Soil Mix
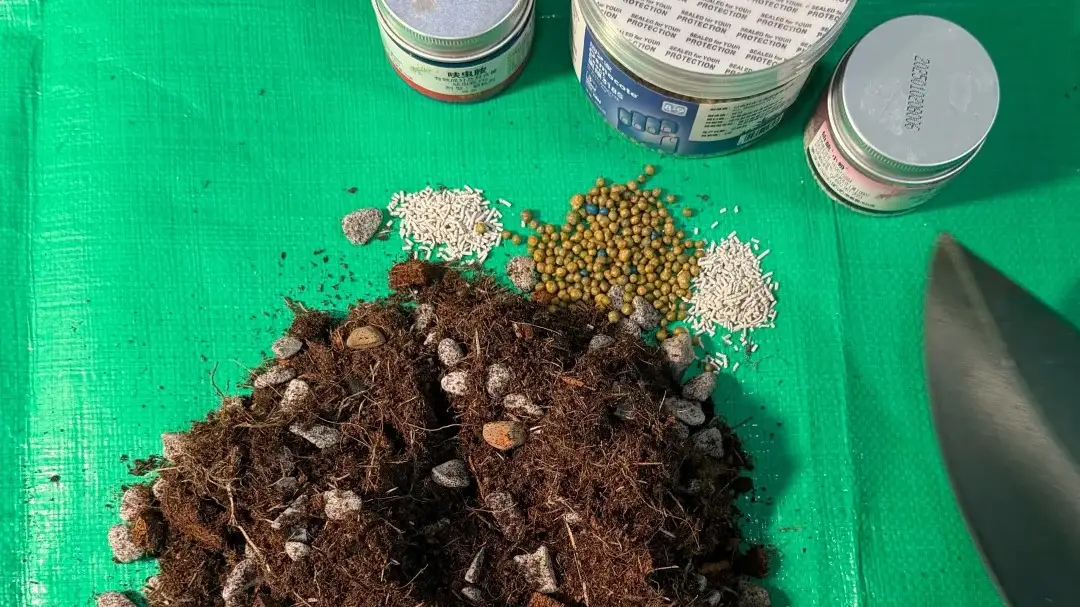
For most of my indoor caladium pots, I start with a simple mix like this:
- 50–60% regular indoor potting mix
- 15–20% soaked coarse coco chips
- 10–15% orchid bark mix or pine bark
- 10% aged rice hulls
- Optional: a small amount of perlite or pumice if the mix still feels too heavy
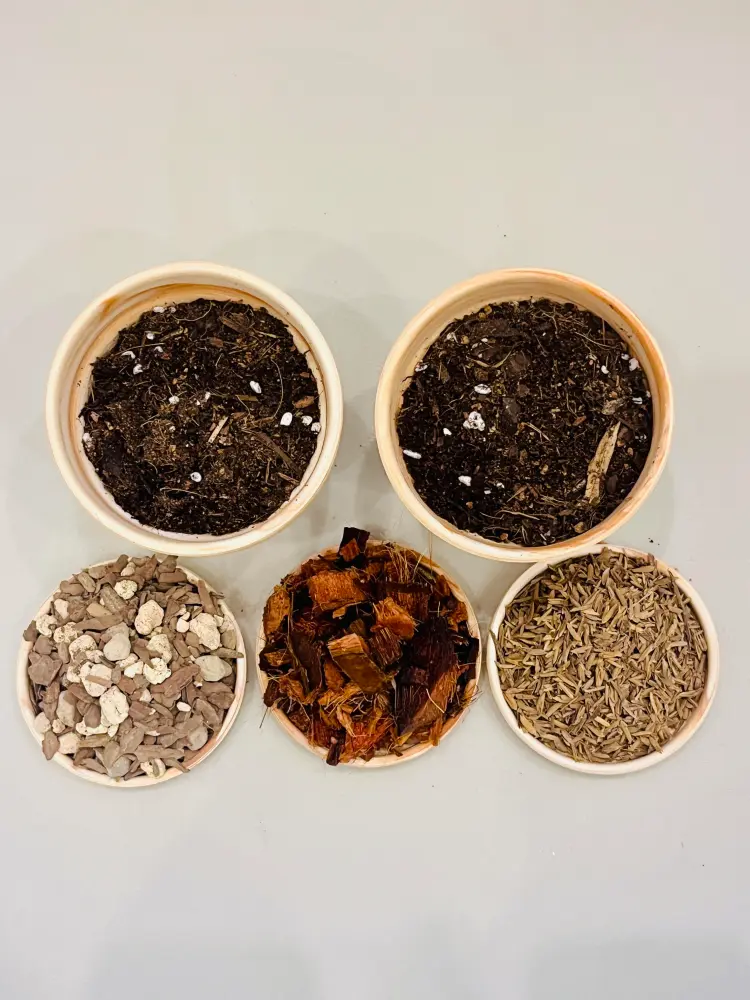
This is not a dry, gritty mix. I do not grow caladiums like succulents, because active caladiums still need steady moisture around the roots. The potting mix gives me that moisture-holding base.
The coco chips, bark, and rice hulls are there to open the mix up. They make regular potting soil lighter, less sticky, and less likely to collapse into a dense wet layer after repeated watering. That is the main difference I want indoors.
How the mix should feel in the hand
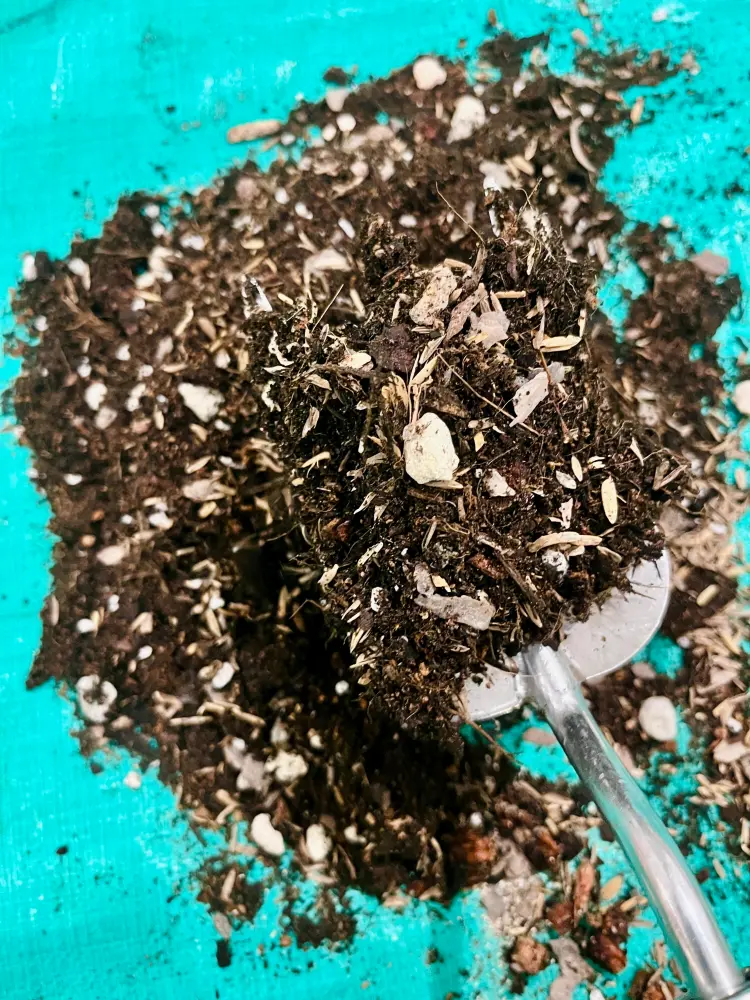
When I squeeze the finished mix lightly, I do not want it to turn into a tight muddy clump. It should hold a little shape from the potting mix, but fall apart easily because of the coco chips, bark, and rice hulls. If it feels sticky, heavy, or too fine, I add more chunky material before using it for caladiums.
Why I Do Not Use Straight Potting Mix Anymore
I do not think regular potting mix is “bad” for caladiums. In fact, caladiums need some moisture when they are actively growing. If the mix is too dry, too chunky, or too empty, small tubers and fresh roots can struggle to keep up, especially when the plant is trying to push new leaves.
The problem is that indoor pots do not behave like outdoor beds. Outside, stronger light, warmer air, wind, and higher daytime temperatures help the soil dry and breathe. Indoors, especially in a cooler room or a weaker window, the same potting mix can stay wet for much longer than expected.
That is why straight potting mix can be misleading. It often looks fine at first. The plant may even grow well for a while. But after repeated watering, a fine mix can become heavier and more compact, especially near the bottom of the pot. Once that happens, the top may look dry while the lower half still feels wet and stale.
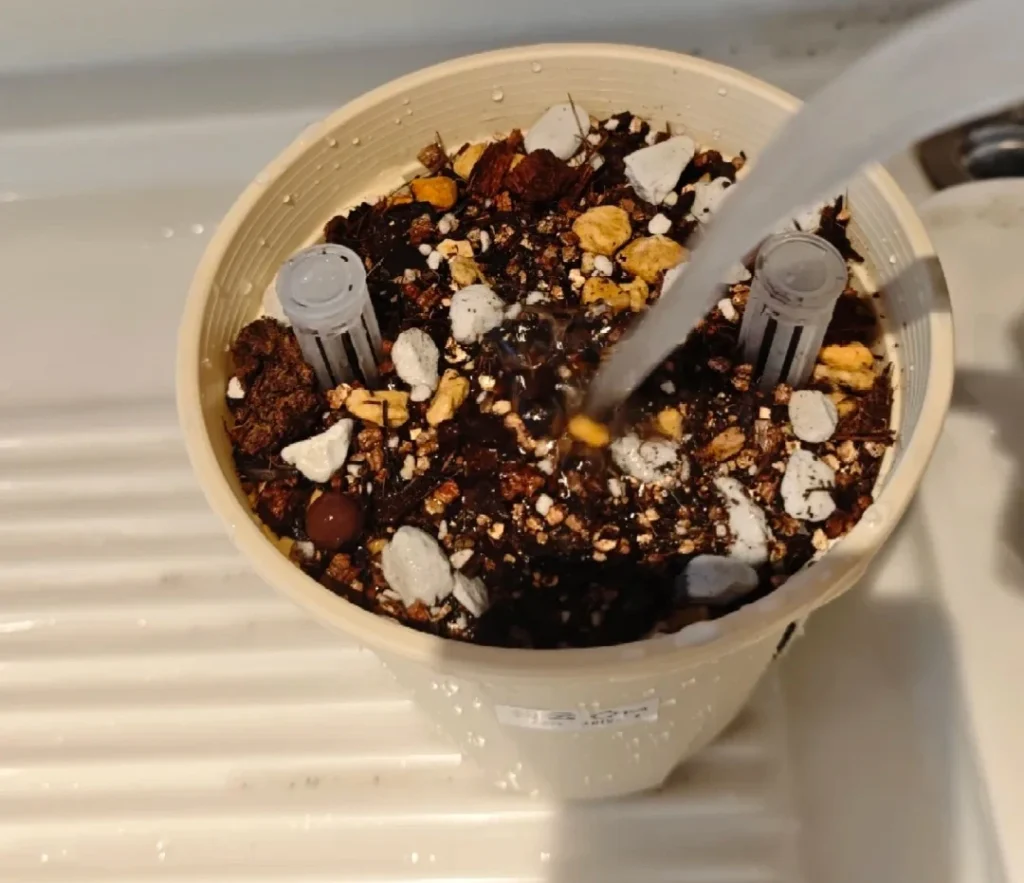
In a small pot, under strong summer light, plain potting mix may not cause obvious trouble. The plant is using water quickly, and the pot has less volume to stay wet. But in a larger pot, a dim corner, or during the slower part of the year, that same mix can become too heavy for caladium roots.
This is also why I try not to read every yellow leaf or soft petiole as simple thirst. Sometimes the plant is not asking for more water. Sometimes the roots are sitting in a mix that has stayed too wet and airless for too long. Slow growth, repeated yellowing, weak petioles, or a tuber that refuses to wake up can all point back to soil that is holding more moisture than the plant can actually use indoors.
So my answer to “Can I use regular potting soil for caladiums?” is yes — but I would usually amend it first. I still want the moisture-holding part of potting mix, but I want to break it open with chunkier materials so the roots have a better chance to breathe.
The Ingredients I Add and What They Actually Do
When I make a caladium soil mix, I do not think of every ingredient as something “special.” I think about what role it plays in the pot. Some ingredients hold moisture, some keep the mix open, and some stop the soil from becoming too dense after repeated watering.
Here is how I usually think about the main ingredients:
| Ingredient | Why I Use It |
|---|---|
| Regular potting mix | Holds moisture and gives the roots a basic medium to grow into |
| Coarse coco chips | Adds chunky space and keeps the mix from becoming too dense |
| Orchid bark or pine bark | Improves structure and airflow around the tuber and roots |
| Perlite or pumice | Helps extra water move through faster, especially in heavier mixes |
| Aged rice hulls | Makes the mix lighter, looser, and less likely to compact |
| A little vermiculite | Useful only if the mix dries too fast; I do not use it heavily in dim indoor conditions |
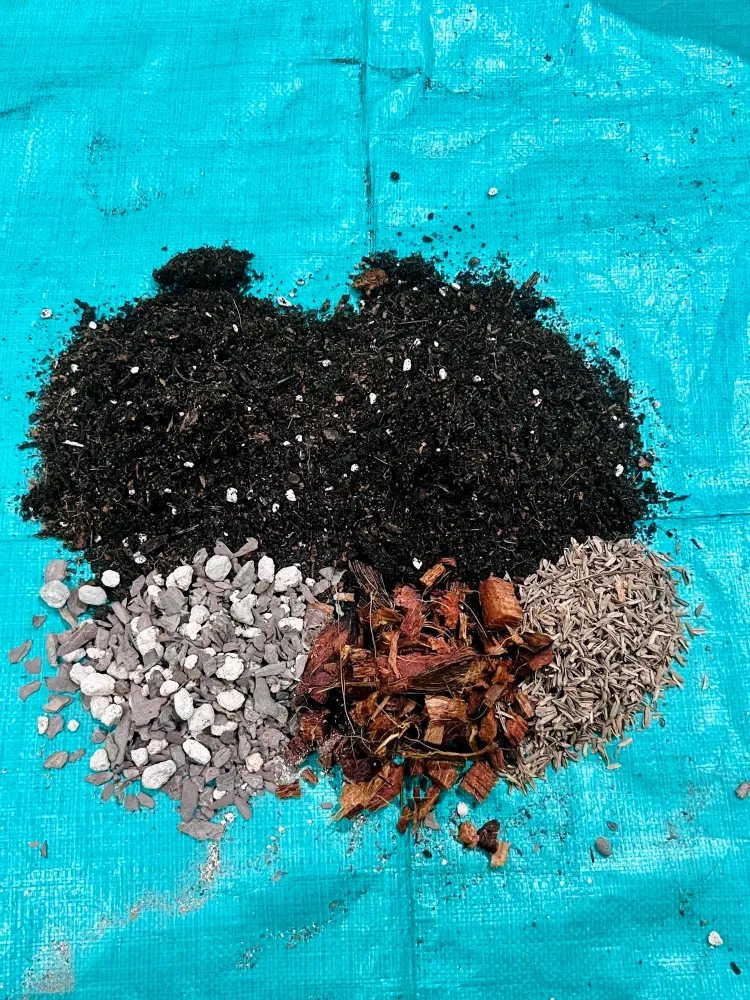
The regular potting mix is still the base for me. I do not want to remove all moisture-holding material, because caladiums grow fast when they are active and their leaves can wilt quickly if the mix dries too sharply.
The chunky ingredients are what make that base safer indoors. Coarse coco chips, bark, orchid mix, perlite, or pumice create more open space in the pot, so water can move through instead of sitting in a fine, heavy layer around the roots.
I usually soak coarse coco chips for a day or two before using them, even when the package says they are washed. It is a small habit, but I prefer not to put fresh caladium roots directly into anything that might still carry extra salts.
Aged rice hulls are one of my favorite small additions because they make the mix feel lighter without turning it into a bark-heavy mix. Vermiculite is the one I use more carefully. I may add a little if the mix dries too fast, but I would not use much in a dim room or during cooler months.
How I Adjust the Mix for My Indoor Growing Conditions
I do not use the exact same soil mix for every caladium pot. The basic idea stays the same, but I adjust the balance depending on the pot size, the season, and how much light the plant is actually getting indoors.
If the pot is large or the room is dim
When the pot is larger than the root system, or when the plant is sitting in a weaker indoor spot, I make the mix chunkier. I use less fine potting mix and add more coarse coco chips, bark, perlite, or pumice.
This is because the plant will not use water as quickly in lower light. A mix that works well in a bright summer window can stay wet for too long in a dim room. In that situation, I would rather give the tuber and roots more air than pack the pot with a moisture-heavy mix.
This is also where watering habits matter. Even a good soil mix can become a problem if I water it as if the plant were growing outdoors in heat and sun. I pay much closer attention to how the pot feels instead of following a fixed schedule. I explained that more in my guide on how to water caladiums indoors.
If the plant is growing fast in summer
In summer, I am less afraid of keeping some moisture in the mix. When a caladium is warm, actively growing, and pushing new leaves, it can use water much faster. In that situation, I may keep a little more regular potting mix or peat-based material in the blend.
This does not mean I want the soil to stay wet all the time. I still want the mix to feel loose and breathable. But I do not make it extremely dry or overly gritty, because fast-growing caladiums can wilt quickly if the mix cannot hold enough moisture between waterings.
For me, summer is when the “moist but airy” balance matters most. The plant needs water to support soft leaves and new growth, but the roots still need oxygen around the tuber.
If I am waking up tubers or growing under weaker light
I am most careful with soil when I am waking up caladium tubers or growing them under weaker indoor light. At that stage, the tuber may not have many active roots yet. If I put it into a large pot full of wet, heavy soil, the soil can stay damp long before the plant is ready to use that moisture.
This is one reason some caladium bulbs sit for weeks without sprouting. The problem is not always the bulb itself. Sometimes the setup is too cool, too wet, too deep, or too heavy around a tuber that has not started growing yet. If the planting depth or setup feels uncertain, I would also compare it with my guide on how to plant caladium bulbs.
In winter or during the slower part of the year, I also avoid treating caladiums as if they are in full summer growth. My indoor light is weaker, the room is cooler, and the pot dries more slowly. That is why I usually make the mix more open and water more cautiously if I am trying to winter over caladiums indoors.
If I am using a grow light, I still do not ignore the soil. Better light can help the plant use water more steadily, but it will not fix a dense, wet mix by itself. For me, grow lights, pot size, soil texture, and watering all work together. I wrote more about that in my guide to using grow lights for caladiums.
Signs Your Caladium Soil Is Too Heavy or Too Dry
When a caladium starts looking wrong, I do not blame the soil immediately. But I do check it early, because soil problems often show up as leaf problems first. The pot weight, drying speed, and new growth usually tell me more than the surface of the soil.
Signs the mix may be too heavy
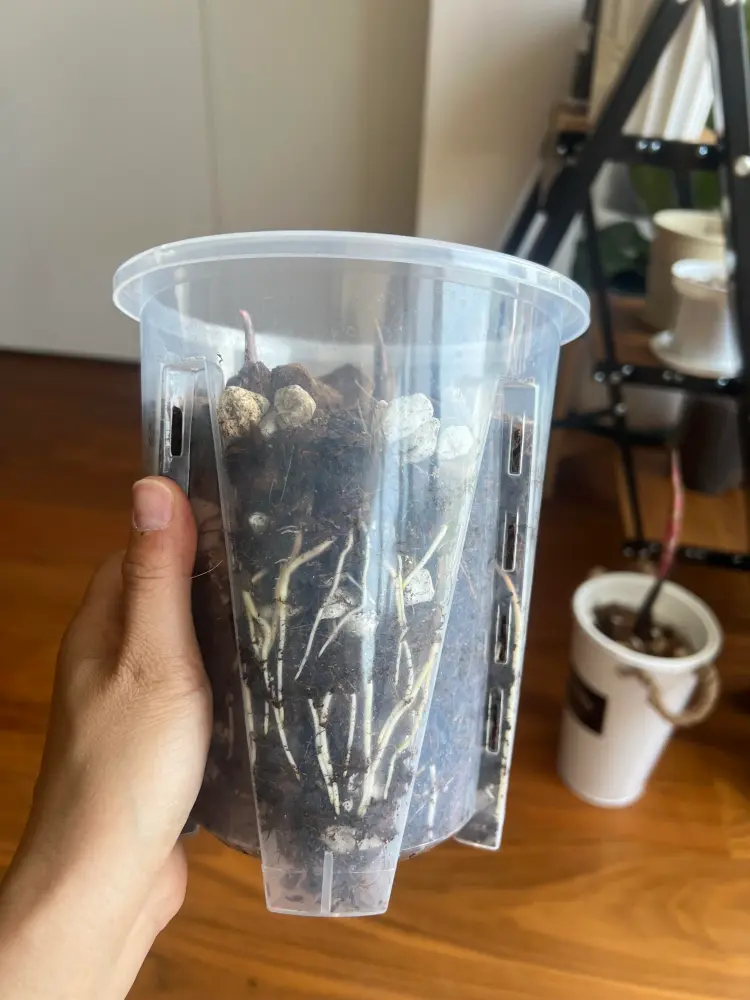
The first sign is usually the weight of the pot. If the top layer looks dry but the pot still feels heavy several days after watering, I start to suspect the lower part of the mix is staying too wet.
A heavy mix can also show up through the plant itself. Lower leaves may turn yellow one after another, even though the plant is not completely dry. The petioles may soften while the soil still feels damp. New leaves may come out smaller, slower, or slightly distorted because the roots are not working strongly enough to support clean growth.
This is where I try to be careful with interpretation. Yellow leaves do not always mean the plant needs more water. If the pot is still wet, repeated yellowing can point to root stress from a mix that is too dense or slow to dry. I wrote more about this in my guide to caladium leaves turning yellow.
A slow tuber can also be a soil clue. If a caladium bulb refuses to wake up, I do not only think about temperature or bulb quality. I also check whether the pot is too large, the mix is too wet, or the tuber is sitting in soil that has very little air. A dormant tuber with few roots cannot use moisture the same way an actively growing plant can.
Signs the mix may be too dry or too airy
The opposite problem is also possible. If the mix is too chunky, too dry, or too fast-draining, the plant may wilt soon after watering. The leaves can droop quickly because the roots do not have enough steady moisture to draw from.
This is especially noticeable when the plant is growing fast. Caladium leaves are soft and thin compared with many tougher houseplants, so they can lose their firmness quickly when the root zone dries too sharply. If the leaves keep collapsing even though the plant perks up after watering, the mix may not be holding enough moisture. I covered this kind of judgment more in my article on caladium leaves drooping.
New growth can also look weak when the mix is too airy for the plant’s stage. New leaves may feel thinner, smaller, or less supported. Sometimes they do not open as smoothly because the plant is moving between dry and wet too quickly instead of growing in a stable rhythm. If new leaves keep coming out curled or stuck, I would also compare the soil condition with the signs in my guide to caladium new leaves curled or not opening.
For small tubers, this matters even more. A large, established caladium can handle short dry periods better than a small tuber with a limited root system. If the mix dries too fast before the roots have filled the pot, the plant may stay alive but never build steady momentum. That is one reason I do not judge soil only by drainage. I also ask whether the plant is actually growing well in it. If growth stays stalled for too long, I would compare it with the patterns in why my caladium is not growing.
In practice, I want to avoid both extremes. If the mix stays wet for too long, I open it up with more chunky material. If it dries too fast during active growth, I keep more moisture-holding potting mix or peat-based material in the blend. The best mix is the one that lets the plant use water steadily without leaving the tuber sitting in stale, heavy soil.
Good Caladium Soil Should Be Forgiving
I do not chase one perfect caladium soil ratio anymore. The more I grow them indoors, the more I care about whether the mix gives me a little room for real-life mistakes.
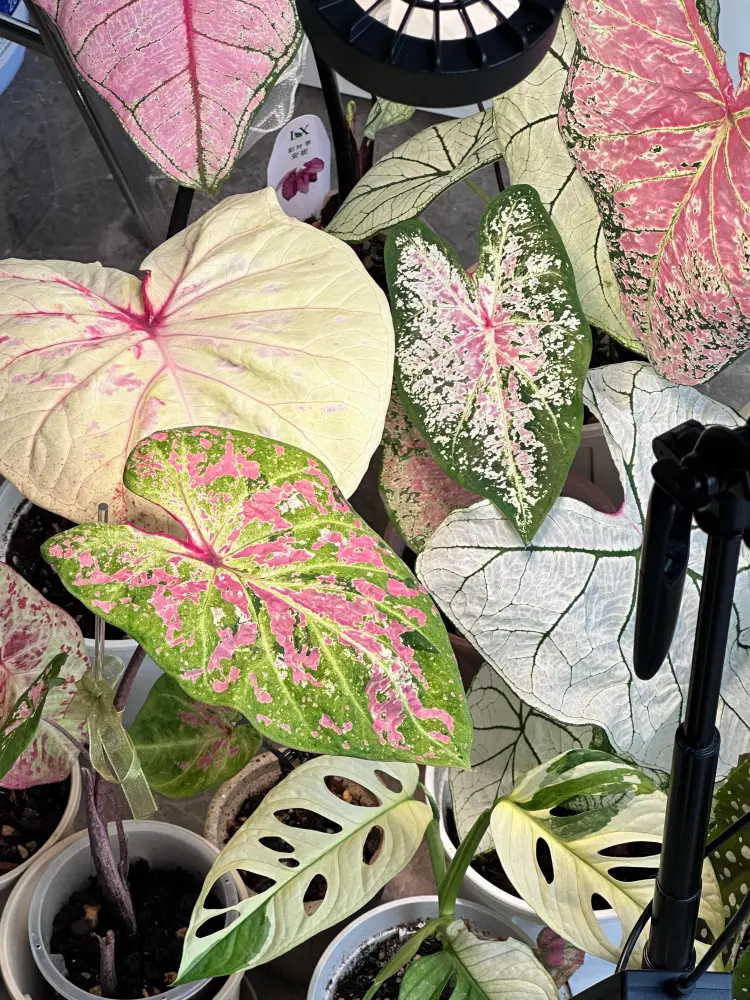
Indoor growing is not perfectly stable. Light changes through the season, rooms cool down, airflow is not always strong, and sometimes I water a little earlier or later than I planned. A good caladium mix should not punish every small mistake. It should hold enough moisture for active growth, but still leave air around the tuber and roots when the plant slows down.
That is why I like a mix that feels light, slightly chunky, and not too fine. If it can stay lightly moist without becoming heavy at the bottom of the pot, it is already doing the main job. For indoor caladiums, that kind of forgiving soil is often more useful than a complicated recipe with too many ingredients.
FAQ
Still unsure how to care for your caladiums overall?
If questions about watering, sprouting, bulb health, or leaf behavior keep coming up, I’ve gathered all my real-world care observations in one place — organized by growth stage and common problems.
Explore the Caladium Care Guide →