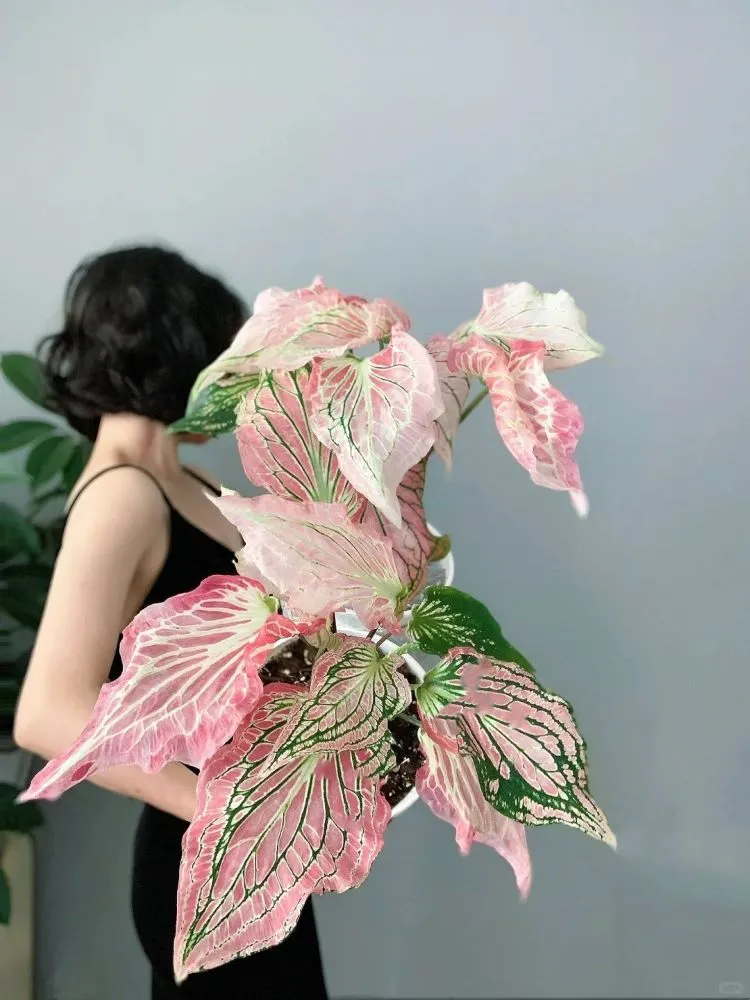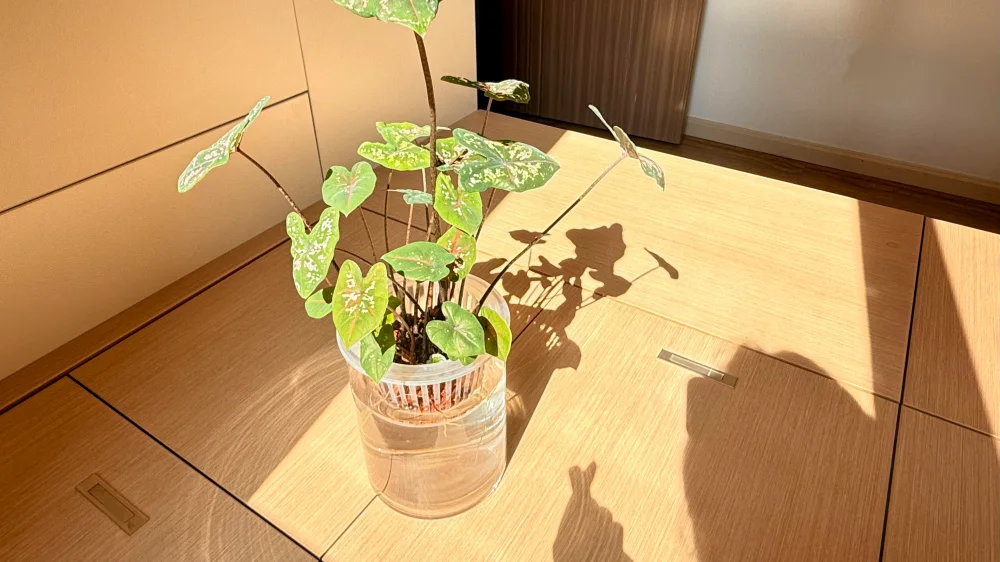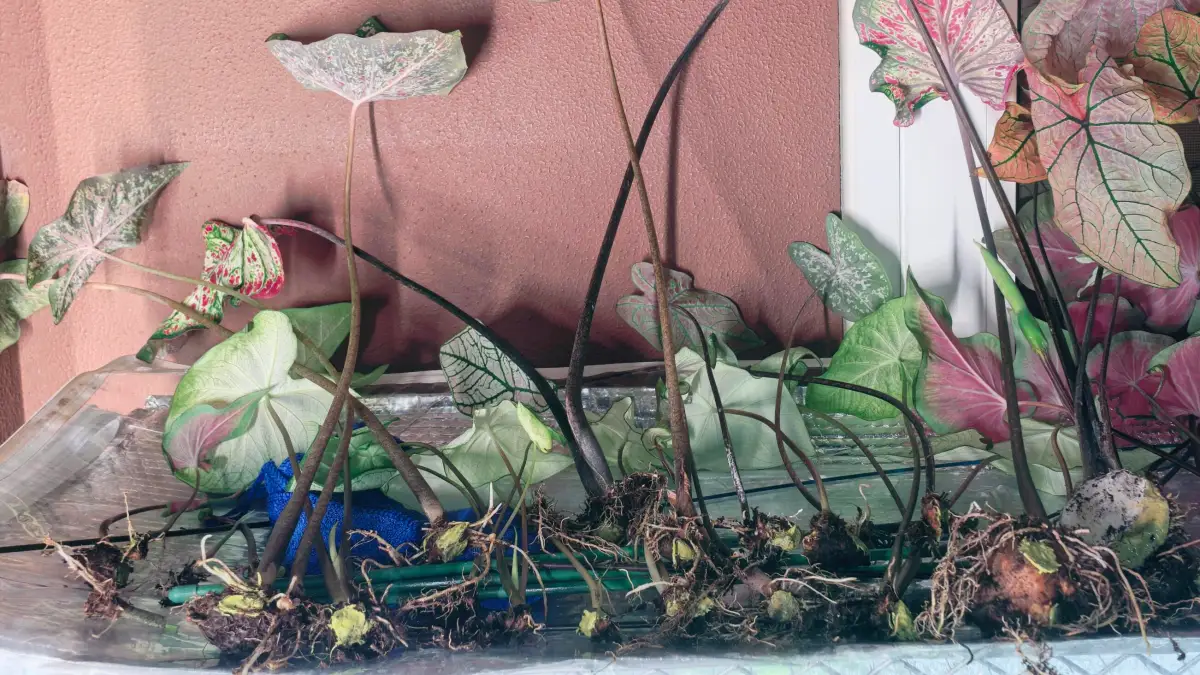
What drew me to Pink Splash caladium was never just the fact that it was pink. What stayed with me was how quickly it moved, and how much it changed over time. In the beginning, I noticed how fast it pushed growth once it got going. Later, what impressed me even more was the color shift — from a fresher early look to leaves that gradually carried more and more pink as the plant matured.
So this is not a generic care guide built around copied rules. It is simply my own growing experience with Pink Splash, from waking up the bulb and getting it to sprout early, to choosing the pot, managing airflow, and watching how the plant changed month by month. The part I found most convincing was not just the fast first flush of leaves, but the whole progression: sprouting, filling out, replacing older leaves, and eventually becoming much pinker than it was at the beginning.
What mattered most in my own results came down to three things: getting the bulb to sprout early, keeping the bulb zone airy enough from the start, and watching how the plant changed color as it matured.
What Pink Splash Looked Like for Me Over Time
One of the most interesting things about Pink Splash caladium is that it did not stay visually fixed for me. It was not the kind of plant I could judge from the first few leaves and assume I already knew what it would become.
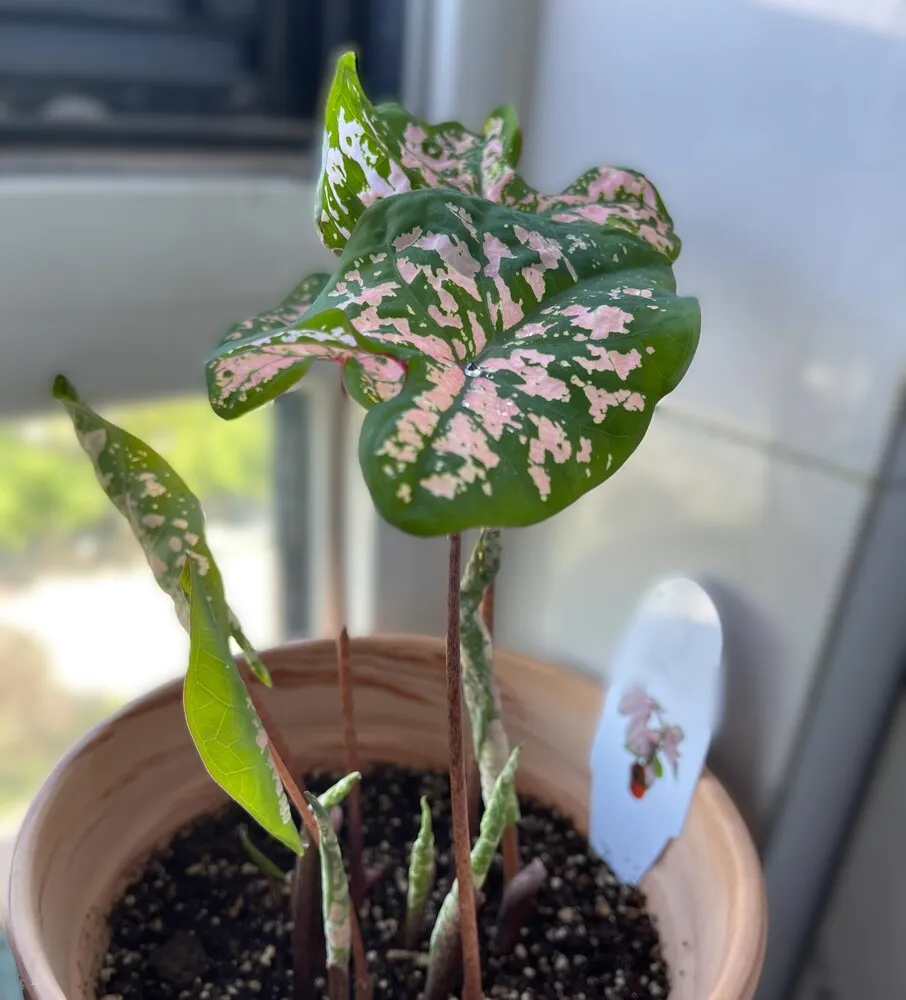
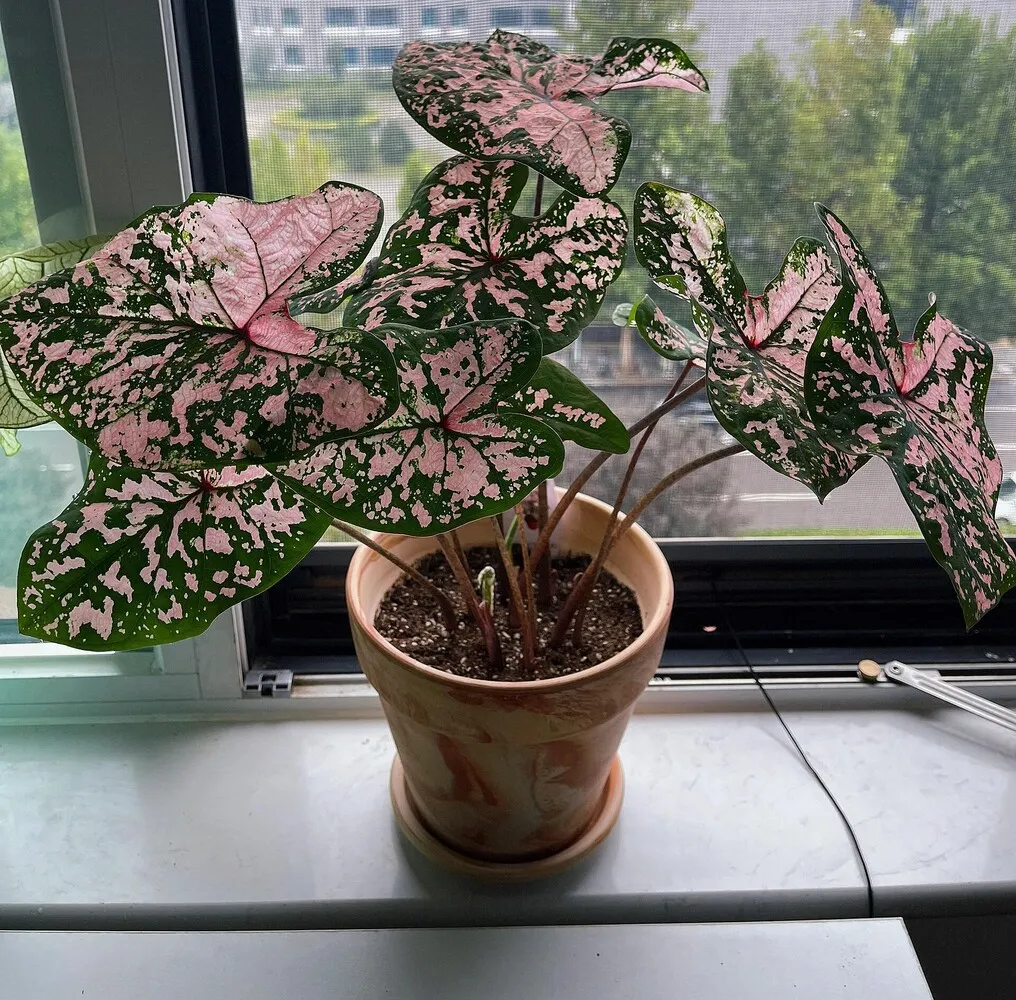
In the first stage, what stood out most was the speed. In about 20 days, it had already pushed out five or six leaves, which made it feel much faster than some of my other caladiums grown from bulbs, especially in the early planting stage. Early on, the change was obvious from week to week because the plant was still building leaf count quickly.
After about three months, the rhythm started changing. Older leaves began to decline while new ones kept replacing them, so the plant no longer looked like it was simply adding more and more foliage without pause. At that point, the total number of leaves did not always increase dramatically, but the individual leaves continued getting larger, and the whole plant started looking more established. That was also the point when I stopped reading leaf count alone as progress, because the plant had already shifted into a different kind of growth.
What surprised me even more was the color shift over time. By around six months, the pink had already become much more noticeable. Then by around eight months, most of the green had nearly disappeared and the plant was close to an almost fully pink look. That was the stage when I felt Pink Splash became much more convincing as a variety.
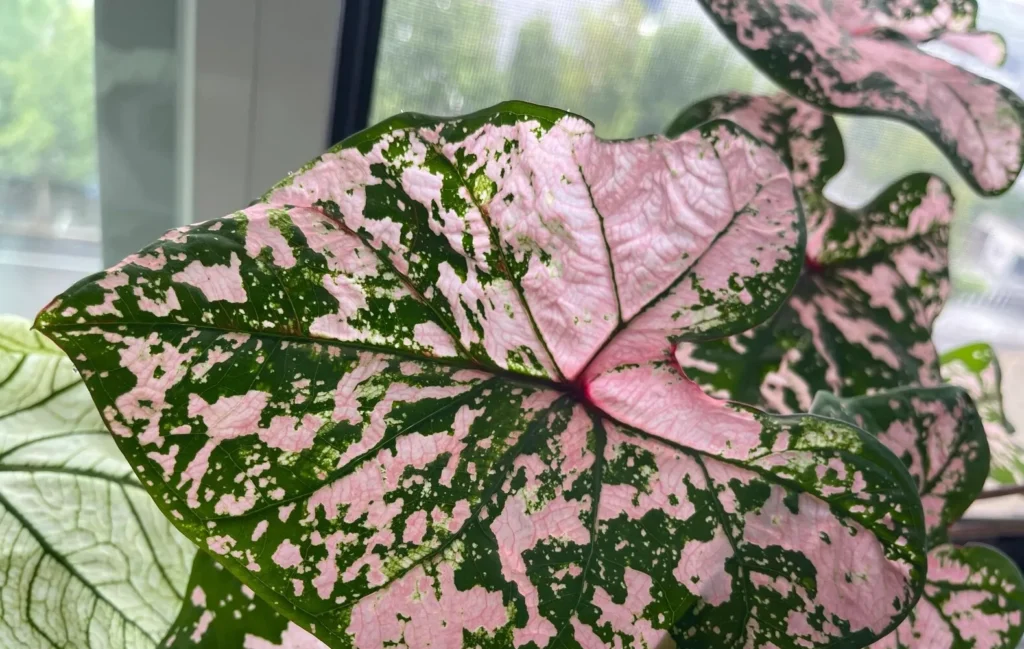
So for me, this is not a static caladium at all. Its real appeal is not just how it looks at the beginning, but how it changes — first through fast early growth, then through stronger mature leaves, and finally through a much pinker overall appearance than it had when it first sprouted.
What I Did Before Planting the Bulb
The part before planting matters more to me than people often expect. I do not think Pink Splash grew quickly because of one magical trick. But I do think the way I handled the bulb at the beginning made the later growth much easier.
Soaking the Bulb Before Planting
Before planting the bulb, I soaked the bulb in a fungicide solution for about 30 minutes. I do not treat this as an absolute must for everyone, and I would not describe it as some secret formula. It is simply one of the steps I personally like to do before planting, once I have checked the bulb and oriented it the way I want.
For me, the point is practical. First, it gives the bulb a basic disinfecting step before planting. Second, I do feel that this kind of soak helps wake the tuber up a little, especially when it has been sitting dormant and dry for a while. I would not overstate that effect, but I do think it helps ease the bulb into growth rather than dropping it straight into soil completely dry and inactive.
Why I Don’t Start with an Oversized Pot
Pot size also matters, but more in relation to bulb size than in the simplistic “bigger is always better” way. In my own setup, I like to size the pot according to the bulb rather than automatically giving every caladium the largest container I have.
For a larger bulb around 6 cm or more, I would use at least a 20 cm pot. For a bulb around 4 cm, I would be more comfortable with something around 15 cm, and for smaller bulbs, around 12 cm can make more sense. A slightly larger pot does help by giving the roots more room later and offering a larger buffer for water and nutrients once the plant is actively growing.
The real problem with a pot that is too large is not that it wastes soil. The bigger issue is that the soil mass becomes too deep and stays wet too easily, especially before the bulb has rooted properly. That usually means poorer airflow in the lower part of the pot and a much higher chance of stale, heavy moisture building up where I do not want it.
So for me, the goal is not the biggest pot possible. It is a pot large enough to support later growth, but still controlled enough that the bulb does not sit over a thick, poorly ventilated layer of wet soil in the beginning.
Why Airflow Around the Bulb Mattered More Than I Expected
If I had to reduce my whole Pink Splash experience to one practical idea, it would be this: fast caladium growth is not just about warmth. It is also about how breathable the bulb environment is from the beginning.
That mattered more than I expected.
Choosing a More Breathable Pot
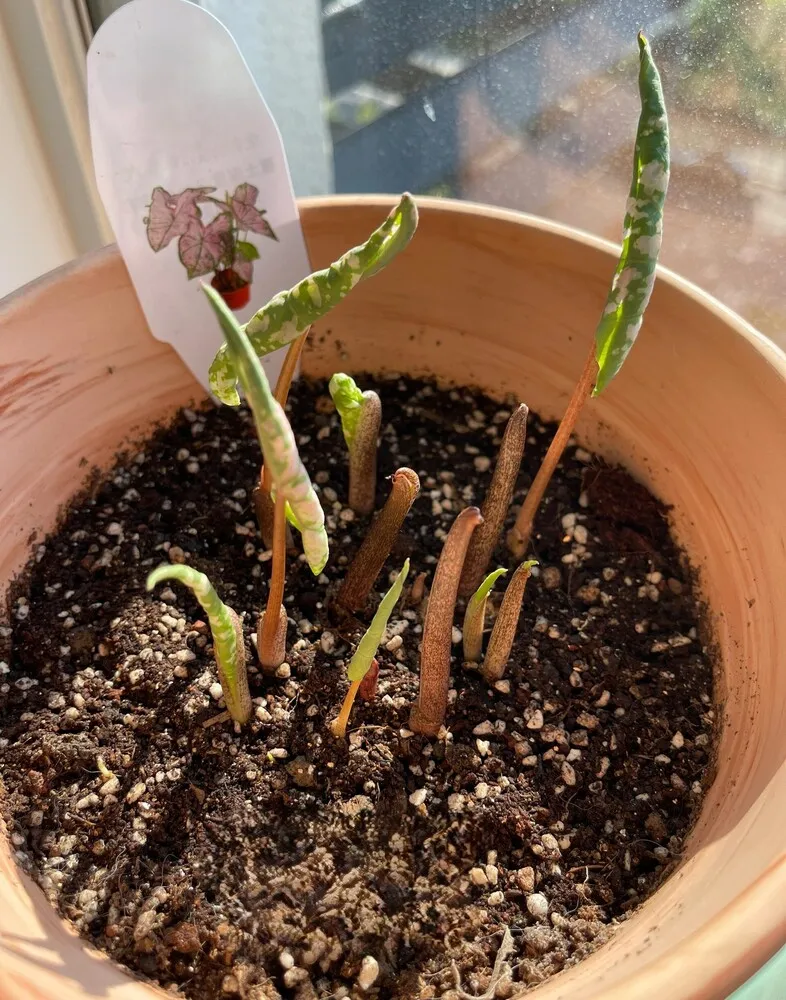
For caladiums, I think airflow matters more than many beginner guides suggest, especially before the bulb has fully rooted. That is one reason I prefer using a more breathable pot, and terracotta is usually my first choice.
It is not because terracotta is somehow more premium or more “correct.” I simply find it more useful when I want excess moisture to leave the container more easily. With a bulb that is still dormant or only just waking up, I feel much safer when the pot itself is not holding onto dampness longer than necessary.
Why I Added Clay Pebbles at the Bottom
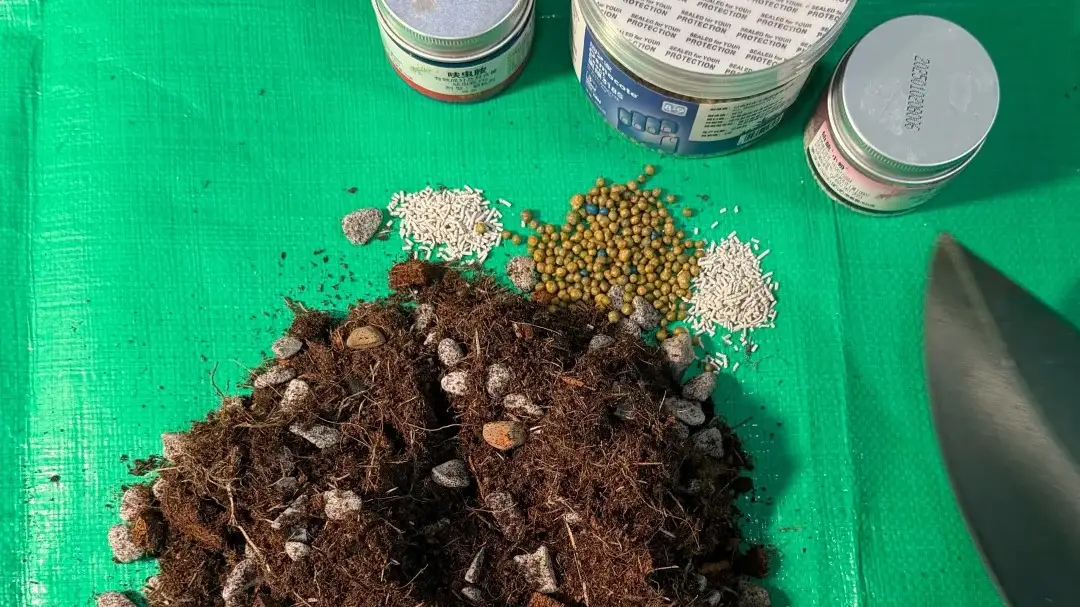
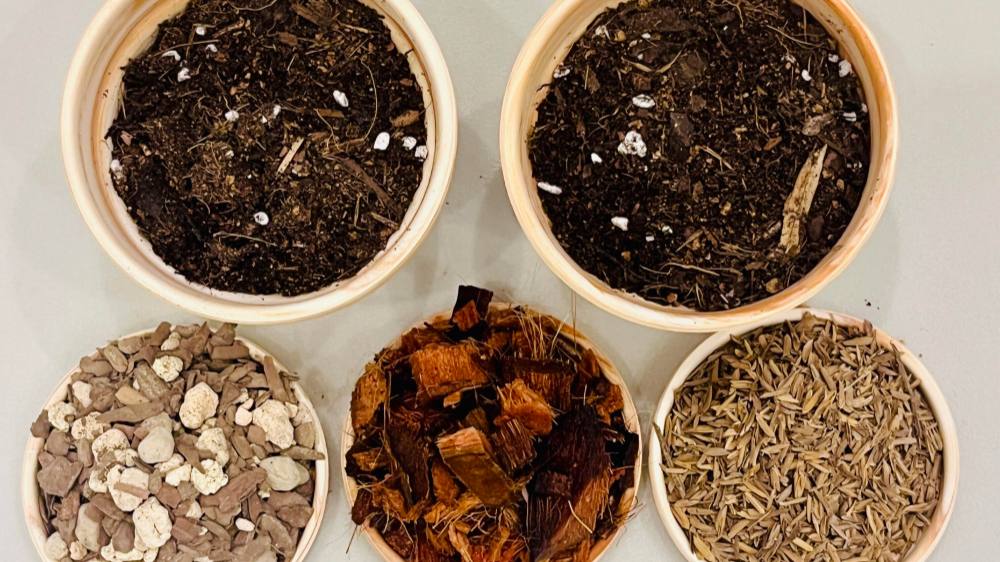
If the pot is on the taller side, I also like adding about 5–8 cm of clay pebbles at the bottom. For me, this is not about building some elaborate trendy potting system. It is a very practical adjustment.
Before the bulb has grown roots, a deep column of wet soil under it can stay heavy for too long. That is exactly the kind of condition I want to avoid. The clay pebbles help reduce that lower wet zone, especially in a taller pot, so I am not asking an unrooted bulb to sit above a thick, stale layer of damp soil.
This step matters even more to me in larger and taller pots, where the lower part of the container can otherwise stay wetter than the top for too long.
Why I Plant the Bulb Shallow
I also plant Pink Splash shallowly, covering the bulb with only about 2–3 cm of soil. I do not bury it deeply or pack a full heavy layer of soil over the bulb.
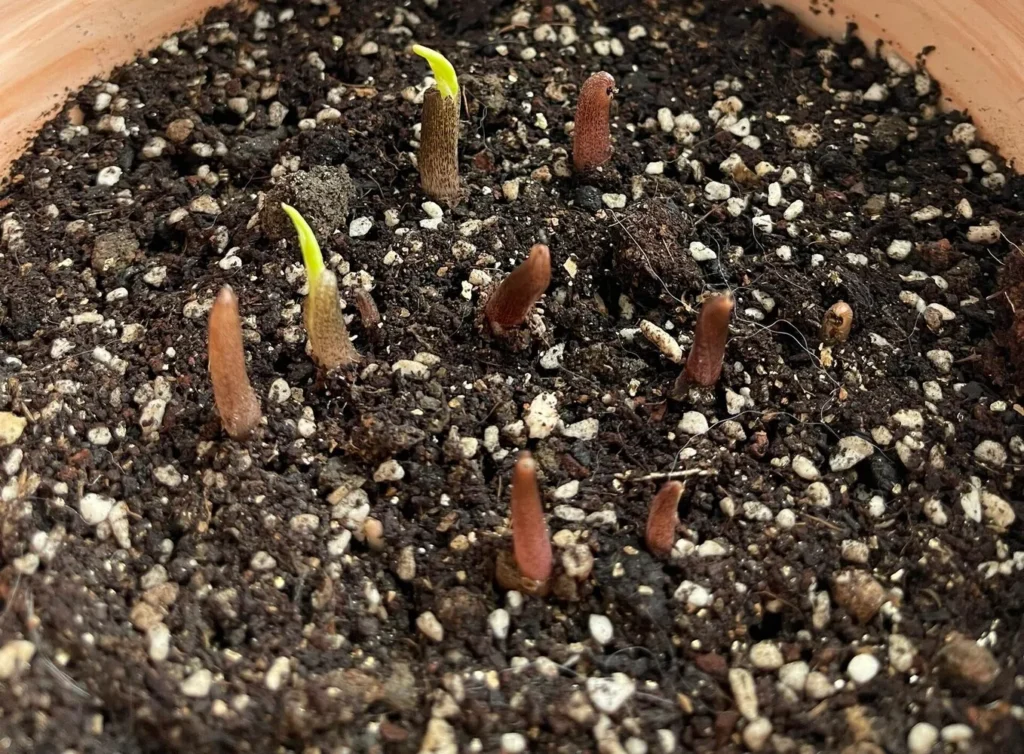
For me, this is mainly about airflow, not laziness or convenience. I want the bulb zone to feel more breathable from above and below. My own impression has been that when the tuber layer has better air exchange, sprouting happens earlier and more confidently. I would not say shallow planting is a magic trick, but I do think it is one of the reasons I saw sprouts relatively quickly.
Pressing the Soil Lightly After Covering
Even though I plant shallowly, I still press the top layer lightly after covering the bulb. I am not compacting the whole pot. I just want the soil to make more complete contact with the bulb.
That slight contact seems important to me. In my own pots, I found that the bulb pushed upward more decisively when the soil made closer contact with it instead of sitting too loose around it. A little contact, a little pressure, and a little stability seem to help it push upward more decisively once growth starts.
So for me, the lesson was not simply “keep it warm and wait.” The real lesson was that the bulb needed a growing environment that could breathe. Once I started thinking that way, a lot of the later fast growth made much more sense.
How I Handled Light from Dormant Bulb to Active Growth
One thing that may be different in my own setup is that I did not keep the bulb in darkness before it sprouted, because I was already thinking about how I handle light during early indoor growth. I know some growers prefer to baby dormant caladium bulbs in a more protected way at first, but that was not the route I took with Pink Splash.
Before I saw any sprout at all, I kept the pot behind the glass on a west-facing balcony. Once it had sprouted, I moved it to a screened balcony that received earlier direct light, where it got roughly 3 to 4 hours of semi-direct sun a day. From start to finish, I never really treated it as a plant that needed to be hidden from light in the early stage.
I do not treat this as a universal light rule. In my case, stronger light worked because the whole setup could support it: the pot was breathable, the bulb was planted shallowly, airflow was good, and moisture was not staying trapped for too long. That is why I see this as an environment-specific result rather than proof that every Pink Splash bulb should be pushed into more sun from the start.
How I Watered It Without Letting the Pot Stay Stale
I often ended up watering about every three days, but that was never the real rule. The real rule was always reading the pot properly, not following a fixed number of days.
Why “Every Three Days” Was Only a Rough Rhythm
Most of the time, my watering worked out to about once every three days, but that was never the real rule. The real decision always came from the condition of the pot.
When the weather was hotter, airflow was stronger, and evaporation was moving quickly, I watered more often. When the weather turned cloudy or rainy, I slowed down and checked the pot first instead of watering automatically. In those conditions, I liked to lift the pot and judge by the weight. If it still felt heavy, I waited. If it felt noticeably lighter, that was when I watered thoroughly.
So the three-day rhythm was just the pattern that happened under my conditions most of the time. It was not something I would copy blindly without looking at the pot itself.
How I Actually Watered the Pot
When I did water, I usually did it around 7 a.m. or around 7 p.m. Each time, I watered until I could see water flowing out from the bottom.
I was not doing tiny top-ups or trying to keep the surface slightly damp all the time. I preferred to water thoroughly, then let the pot move toward dryness again, instead of keeping the root zone in a constant in-between state. That approach made more sense to me in a breathable setup where airflow and evaporation were already part of the system.
For me, the important thing was not memorizing a frequency. It was learning how to let the pot dry enough to stay fresh, without letting it swing so far that the plant stalled.
How I Fed Pink Splash During Fast Growth
Feeding was another part of the process that felt important, but I do not see it as a rigid formula I would hand to everyone as a rule. This was simply the rhythm I used with my own Pink Splash, and in this case, it worked well.
The first watering the bulb received was the same fungicide solution I had used for soaking. The second time, I used a rooting solution. By the third watering, the bulb had already sprouted, which meant I was no longer just trying to wake it up — I was already supporting active growth.
After that, I moved into a light but frequent feeding rhythm. I did not chase heavy fertilizer or try to push the plant with strong doses. What I did instead was much simpler: once growth had clearly started, I began adding diluted liquid fertilizer into the regular watering rhythm, adjusting it according to how quickly the pot was drying.
For me, the principle was simple: feed lightly, feed consistently, and let the growth build from there. Pink Splash was already responding quickly, so I did not need heavy fertilizer. What worked better was small, steady support while the leaves were coming fast.
Why My Pink Splash Became Pinker and Pinker
One of the most rewarding parts of growing Pink Splash for me was realizing that the plant did not reveal its full character right away. In the beginning, it was already attractive, but it did not yet look like the version that stayed in my mind later.
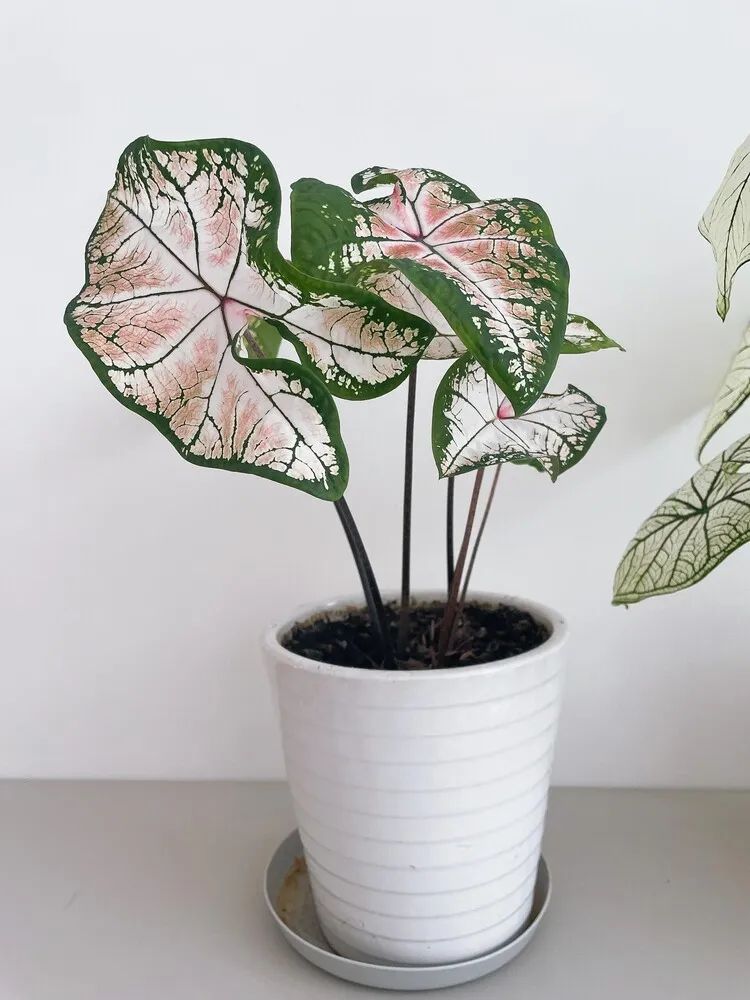
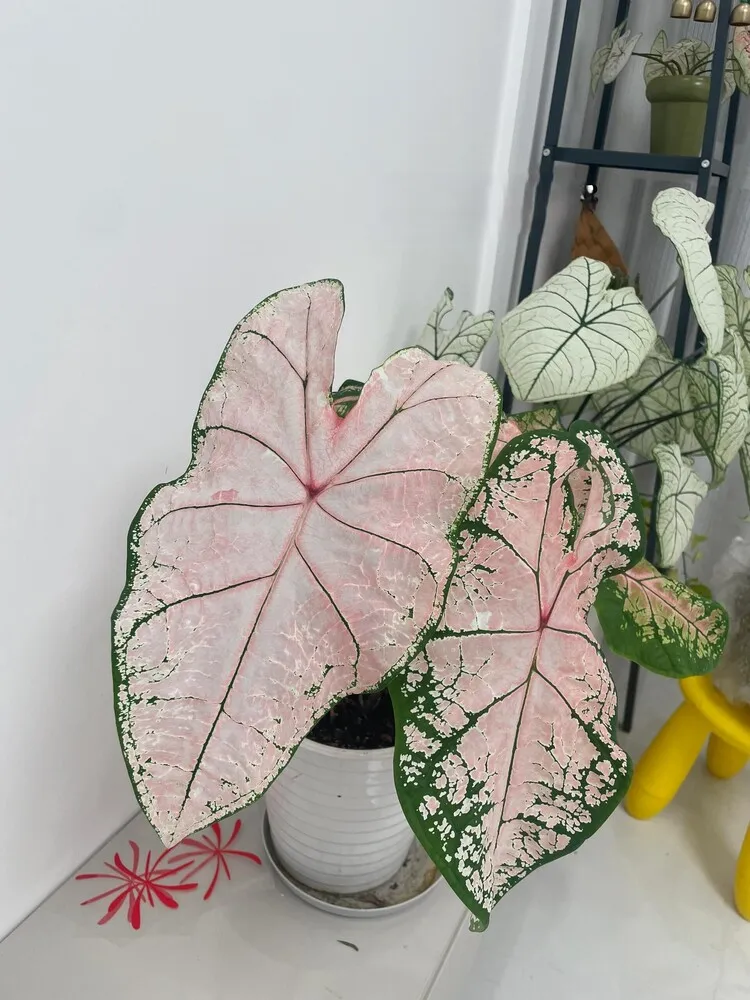
By around six months, the pink had become much more noticeable. The green areas started shrinking, and the overall impression of the plant began shifting away from a mixed pink-and-green look toward something much softer and more saturated. Then by around eight months, it was close to an almost fully pink state, which was very different from how it had looked earlier on.
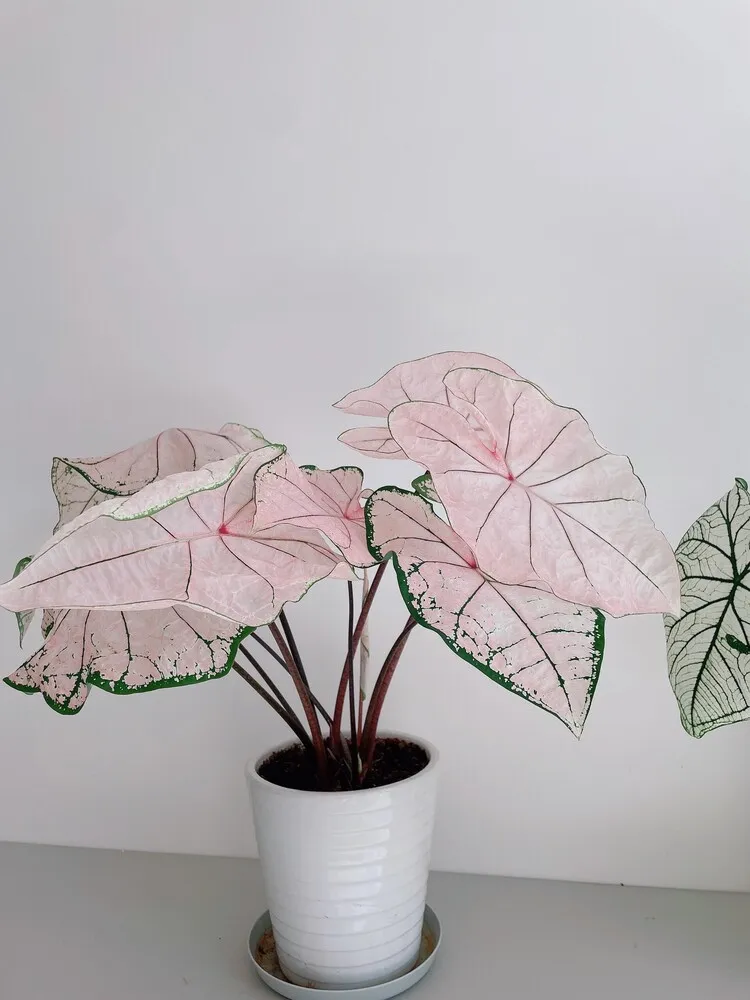
That gradual color shift is one of the things I find most convincing about this variety. Pink Splash does not give you its full character at the beginning. It becomes more persuasive as it matures, which is why I do not think it makes sense to judge it too quickly from the first stage alone.
At the same time, I would still treat this as my own result under my own growing conditions, not a guaranteed universal pattern. I suspect the color shift can be influenced by things like light, plant maturity, and season, so I would not expect every Pink Splash to change in exactly the same way. Still, in my case, that gradual move toward a much pinker plant was one of the clearest signs that Pink Splash is one of those varieties that only becomes more convincing with time, which is also why I tend to compare it with other caladiums that change a lot as they settle in.
What I would not copy blindly from this article
- The exact watering interval
- The exact amount of sun
- My pot size without adjusting for your own bulb size and climate
What I Think Matters Most If You Want Pink Splash to Perform Well
After growing it through the full cycle, I think Pink Splash performs best when several simple things work together rather than one dramatic trick doing all the work.
1. Start with air, not just water
The first thing I trust now is not water alone, but air around the bulb. If the pot is not breathable, the soil layer is too heavy, and airflow around the container is weak, then watering and feeding become much harder to get right. In my experience, Pink Splash responded better when the bulb zone could breathe from the beginning, instead of sitting in a stale, slow-drying setup.
2. Shallow planting helped more than deep planting
Shallow planting made more sense to me than burying the bulb deeply. Covering it with only a thin layer of soil seemed to give the tuber a more breathable upper zone, and I do think that helped with earlier sprouting. I would not claim that shallow planting is the only correct method, but in my own conditions, it felt much more supportive than deep planting.
3. Do not copy a watering schedule without checking the pot
“Every three days” was the pattern I often ended up with, but it was not the real rule. The real rule was always the pot itself. If the weather was hotter and the mix was drying faster, I watered sooner. If it was cloudy, cool, or rainy, I waited longer. For me, the important thing was not memorizing a number of days, but learning how to read weight, dryness, and evaporation in the container I was actually using.
4. Pink Splash is more rewarding if you grow it long enough
This is probably the most variety-specific lesson of all. Pink Splash did not show me its best version immediately. It was attractive early, but the most convincing stage came later, when the plant had matured, the leaf size had improved, and the pink started taking over more of the foliage. If I had judged it too early, I would have missed the part that made it feel truly special. For me, this is a variety that becomes more persuasive with time.
Is Pink Splash Worth Growing?
I think it is, especially for growers who enjoy a plant that changes over time instead of showing everything at once. What makes Pink Splash satisfying to me is not just that it turns pink, but that the whole process stays interesting: it grows quickly early on, fills out fast, and then keeps shifting as the plant matures.
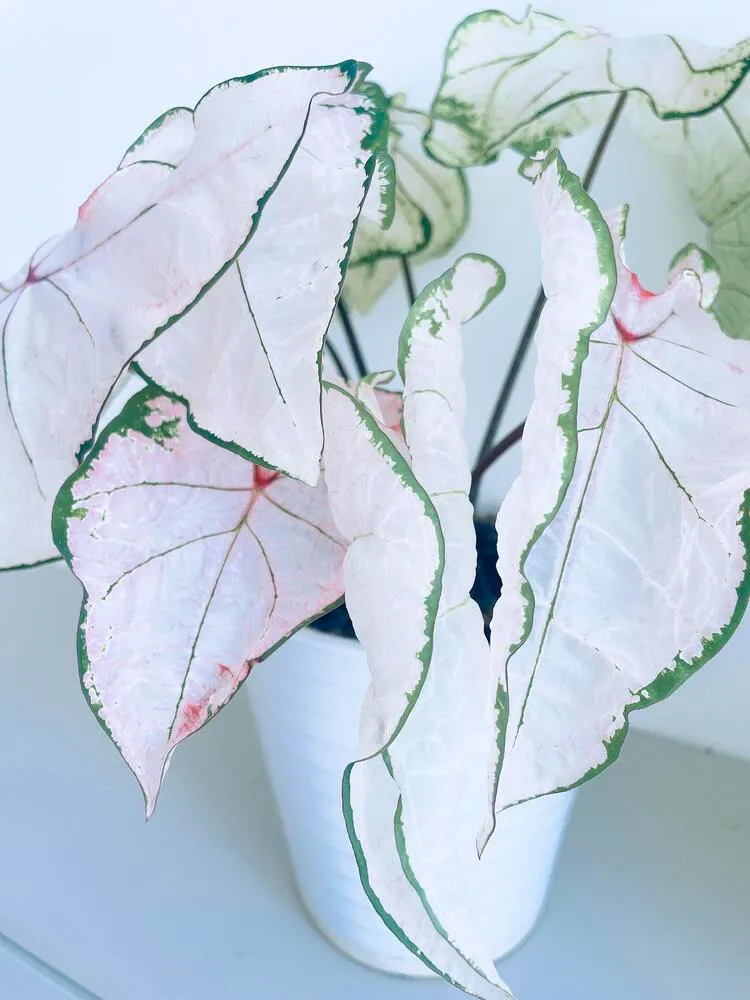
At the same time, I do not think Pink Splash automatically shows its best side in every setup. If the growing environment stays too stuffy, the pot is too deep, the soil layer is too heavy, or watering becomes a rigid routine instead of something adjusted to the pot, a lot of its advantages can get buried. In that kind of setup, the plant may still grow, but it may not feel especially convincing.
For me, Pink Splash is one of those caladiums that gives very clear feedback. When the environment suits it, it responds fast, grows with confidence, and becomes more beautiful over time. That is why I think it is worth growing. Not just because it is pink, but because it is a variety that makes its progress easy to see.
FAQ
Want to Explore Other Caladium Varieties?
Florida Sweetheart is just one of many caladium varieties that behave differently in containers. If you’re curious how other types compare, you can browse the full collection of varieties below.
Browse All Caladium Varieties →